This is a post on papermaking using recycled fibers. I also have two posts on natural papermaking with cattail heads (which works well) and cattail leaf (which needs some improvement).
The commercial process of producing paper is an incredibly environmentally destructive one, contributing to deforestation, air pollution, and water pollution. The consumer demand for paper is so high that 35% of our trees are logged just for this purpose. The process of making paper releases greenhouse gasses and toxic chemicals into our air and water. As a druid seeking a deeper relationship with the land, I work hard to develop alternative means to avoid supporting harmful practices, like the purchase of new, non-recycled papers. We have massive deforestation in the world–so much of it driven by the demand for wood-based products.
Towards that end, I have developed ways of recycling paper and using local, abundant plant-based materials for papermaking. This post will detail how to create paper from recycled materials, such as office paper waste, junk mail, paper scraps, paper bags, etc. I will also soon post about plant-fiber papermaking.
If you find yourself in need of ritual papers or papers for special purposes, hand papermaking is a great skill to have. The paper below, containing ashes from Yule and Beltane fires, was made by a friend of mine as a gift. This sacred paper can be used for all sorts of things!

A Short History of Papermaking
Papermaking is an art that is over 5000 years old. The first papers in recorded history were papyrus (ancient Egypt) and Tapa (China). Both were used in record keeping and both were made of plant fibers local to the area. In AD 105 the Chinese created our first “modern” paper from waste rags from fabric. Within five centuries, the Arabic world had developed fine papers and exported these all over the eastern hemisphere, including parts of Asia, the Middle East, and Europe. Italian papermakers picked up on the Arabic techniques and improved them, creating the first paper mill. In the early 14th century, paper was becoming more and more important to European societies—in both the public and intellectual spheres. Because of this, paper mills spread throughout Europe during the Renaissance and later to the Americas. Jumping toward the 21st century, concerns about whether the information era will cause an end to paper as we know it has surfaced and the art of handmade papermaking continues to be one practiced by a select few.
Papermaking Supplies
You can get started making handmade paper for a $30 or less investment–most of this should be available secondhand. Here’s what you’ll need:
1) A blender. I have a blender just for papermaking, but its possible to use your regular blender if you clean it out sufficiently after use (and if you are not using any additives or chemicals, which I don’t recommend you using anyways). I recommend picking up a used blender at a yard sale or thrift store.
2) A mould and deckle. The mould and deckle is the part of the process that allows you to form sheets of paper from a vat of pulp. The mould and deckle are two frames with an inside diameter of whatever size of paper you want. I have moulds and deckles in 8.5×11” and 11×17”, but you can make them of any size. Embroidery hoops and used picture frames can both work for this purpose. One of them should have a screen (window screening is fine; choose fiberglass over aluminum if possible) stapled to them. To do the pour method (see below) you need a special larger deckle that is 3” high.
3) Couching sheets. These are simply sheets that are slightly larger than the size of your frame (so about 10″ x 13″ would work for an 8.5 x 11″ frame). For couching sheets, you can use any cotton-based or muslin material. Old bedsheets work really well for this–I recycle my old ones this way, and ask family and friends to save them for me (or pick some up at yard sales). You can use any type of cotton fabric or unbleached muslin to hold your paper. Cut your couching sheets larger than your mould or deckle.
4) Sponges: Fairly self-explanatory; you can also omit these if you don’t have any around.
5) Materials to create pulp: old office paper, envelopes, bills, dryer lint, old clothing, plant materials, etc! Paper with text or writing is fine and will give you neat effects. I do not recommend using newspaper because it has a high acid content and will deteriorate faster. You can also purchase commercial cotton linters or abaca fibers—but I find these expensive and not necessary for successful papermaking. These fibers strengthen your recycled pulp, giving you a stronger final recycled paper.
6) Paper additives (optional) – paper additives come in two forms. Those that you add to the paper for a functional reason (such as paper sizing) and those you add to the paper for effect (such as cold water fabric dyes sprinkled over the top, dried flowers, confetti, glitter, etc).
7) A basin or sink in which to work. I recommend using a sink if you have a garbage disposal—the excess pulp can then go through the disposal. If you don’t’ have a garbage disposal in your sink, I would use a basin instead so that you don’t have to sieve the pulp out of the sink before releasing the water down the drain.
Additional things helpful to the papermaking process:
Easy Access to water and electricity. For modern papermaking, having your blender close by and a sink is very necessary. Obviously, water and electricity don’t combine well, so take reasonable safety precautions when using this equipment.
A workspace that you don’t mind getting wet. I’ve made paper in kitchens, garages, and outside in the sun. All are good choices. Papermaking is VERY messy, so choose your workspace carefully.
Old Towels: For cleaning up your mess. Trust me, it will happen!
A sunny day with little wind: Your paper dries quickly outside in the sun (2-4 hours). In my part of the world, it takes 2-3 days to dry indoors due to our high humidity level.
What can go in handmade paper?
You can put all kinds of “inclusions” in handmade paper. Here are a few of my favorites:
- Dried flowers from the garden
- Dried anything from the garden that is soft
- Bits of fabric and yarn (cut up small)
- Paper scraps and junk mail
- Tea bags (used)
- Dryer lint
- Dried leaves and herbs
- Cut grass
- Coffee filters (used)
- Paper towels used (with paint, not food!)
- Bits of letters
- Book pages (removed from books falling apart, etc)
- Tissue paper (recycled from gifts)
- Old clothing, torn up small
The sky is the limit. For things that are thicker or harder, soak them at least 24 hours before you put them in your blender. I advise against anything super-hard like pine cones or very hard seeds or nut pods—they simply won’t blend well and will cause you problems in your paper.
Stages of Papermaking
Prepare your recycled materials and paper inclusions.
Begin by tearing up the paper you want to recycle into 1.5” squares. I stress that tearing is important because you want to retain as much of the paper fiber as possible (if you cut it, you’ll cut the fibers and end up with weaker paper). Tear up a good bit, and then place them in a bucket or large bowl of water. Allow the fibers to soak at least an hour (for standard office paper) or much longer (for heavier stuff such as cardstock). I recommend soaking thicker papers like watercolor paper, abaca fibers, and so forth overnight.
If you are using flowers, tea, or plant matter with your paper and don’t want them bleeding into the paper (can look cool, but not always what you want) you’ll also need to boil those for 10 minutes or so. This keeps the pigments in the flowers from spreading into your paper, creating small halos around the plant. Personally, I like the effect but not everyone does.
Prepare your work area
Set your blender up as close to your sink/vat as possible. Fill your vat/sink up with enough water to completely cover the mould and deckle when they are placed inside (about 1-2” over is a good amount).
Prepare a place to lay and press the paper after you create it—take an old towel or other absorbent surface and lay it near your work area. This is where you will transfer your freshly couched sheets.
Your couching sheets should be damp before use, especially if you are using a thicker material like felt. You can soak them and then let them sit out, or even hit them with a spray bottle before use.
Create your pulp
Once you have soaked your pulp, grab a decent handful of it and place it into the blender, filling the blender up about 1/3 of the way. Fill up the blender to the top with water. If you use too much pulp you’ll stress the blender, and if you use too little, you’ll be a bit inefficient in your pulp production. Give the pulp a good blend – for a solid pulp, 30-40 seconds is sufficient. As you are blending, watch to make sure all the fibers are spinning. If they aren’t, then you have too much pulp in the blender—remove some and add more water.

Note: How much you blend the pulp can affect how your paper looks. If you blend the pulp only partially, you’ll end up with a much different effect than if you blend it completely. For a complete blend, you’ll want to start on low for about 15 seconds then move to the highest setting for another 15-20 seconds.
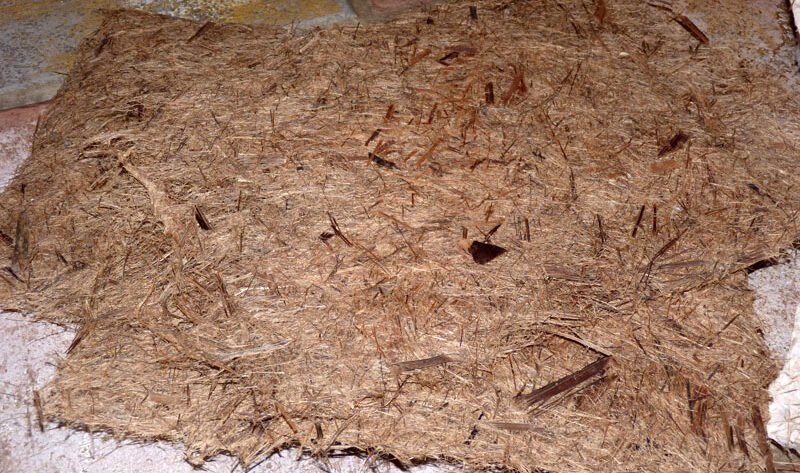
Blending time and speed will determine how quickly your papers turn to pulp. When using recycled papers, you may consider blending them less to give you a neat effect. Blending them for only a few seconds will leave portions of the text readable and give you very unique sheets of paper with flecks of text that can still be read! You can combine different colors of paper for a confetti look too. Here is an image of a piece of freshly pulled paper with text bits from a recycled book combined with some recycled purple tissue paper pulp:

Method 1: The Pull Method
The first method of papermaking (and the way its traditionally done) is to pour your pulp into a large vat of water and pull sheets from it. The Pull Method allows you to create many sheets of paper similar in appearance. The paper from the pull method is also thinner than that of the Pour Method (discussed below). Both have their benefits.
To get the right consistency of pulp in the vat, you’ll probably need to add three or so blenderfulls of pulp to your vat.
Once you have added the pulp, swish it around with your hand to get any that may have settled, and then slip your mould and deckle into the pulp. Hold the mould and deckle together, making sure that the mould (the part with the screen) has the screen facing up. Pull the mould and deckle straight up (moving the mould and deckle together back and forth a bit to swishing around the pulp and water a bit to even it out as you pull). Stop moving the mould and deckle once most of the water drains out.

Take one of your dampened couching sheets and place it over the freshly pulled piece of paper. You can use a sponge to get off a bit of excess water, then take the sheet to your absorbent cloth and flip the entire mould over. The paper should come off the mould and stay on the couch sheet. Sometimes it is a bit stubborn, and I find that if you pull on the edges of the couch sheet away from the mould, it helps get the paper unstuck.

You can continue to pull sheets of paper, couch them, and lay them on top of each other (creating a stack) until you have created all that you want to. After you pull 5-8 sheets of paper, you’ll notice that your pulp will thin out considerably. Continue to add new blenderfulls of pulp (and additional water) as necessary as you go along. You can subtly change the color of the pulp as you add blenderfulls by changing the types of recycled papers you put into the pulp.
Method 2: The Pour Method
This is a method I developed to allow me to create marbleized paper techniques and also to create thicker papers. It also allows you to experiment with different recipes for paper, one blenderfull at a time. I highly recommend it for mail art, as you get thicker papers which are useful for sturdy bases and backgrounds. For this technique you will need a larger deckle (3”) high.
Place your mould and deckle in the vat of water. The top of the deckle should stick out of the water, preventing the water inside from flowing out.

Create your pulp as normal in your blender. Instead of pouring the pulp directly into the vat, pour about ½ a blender full into the inside of the deckle. Swish it around with your fingers till you see the pulp evenly spread within the deckle. Grab the mould and deckle and pull the whole thing out of the water—and you have your sheet of paper!
You can experiment with all sorts of techniques with this method including combining two different types of pulp or making layers of color.
Give it a little color!
Some of the sheets in my examples have been treated with a powdered cold water fabric dye or natural dyes (walnut ink, berry dyes, etc.). You can do one of two things:
1) While the paper is still wet (just after pressing), you can take the package of dye and sprinkle some of it on each sheet (as shown in my pictures of my paper drying). This gives you a speckled effect, and is really quite stunning.
2) You can also add dye to your paper while you are making it. Add a few tablespoons to your pulp in your vat—and use gloves to pull your paper!
3) If you want color and don’t want to deal with the dye, you can also add colored sheets of recycled paper, brightly colored tissue papers, natural plant dyes (like chamomile or pokeberry) or even construction papers to your pulp and blend it well. All of these options produce great paper with fantastic color!

Drying and pressing your paper
Once you have a decent sized stack of wet papers, take your stack outside. I find the easiest thing to do is to press it by using a piece of board on the sidewalk or driveway. I stand on it for about a minute, allowing much of the water to be removed.
Next, I remove each sheet (keeping them on their couching sheets still) and lay them in the sun to dry.

Often, I will mist them and iron them to get them completely flat once again.
Alternatives to pressing include using a larger commercial press overnight, or even using an vintage laundry press to press your sheets dry faster!
Handmade Paper Projects
There are just so many things you can do with handmade paper. Here are a few recent things that I made with papers:


Thank you for this excellent and educational post. This is something that I have always wanted to do. I’ve had a dream of a journal made entirely of handmade pages with pressed flowers and leaves in the paper. This is definitely something I will try my hand at one day.
Thanks for the comment! Its really quite easy. Once you get the hang of pulling the sheets, its pretty much something that anyone can do–artistic talent or no :P.
I love comments, so I like to leave some from time to time for other people. 🙂 I definitely need to try it out one day.
Love this tutorial, and your entire approach from the ethical philosophy to the beautiful creations you have made. Fabulous! Thanks. I’m on my way to collect some cattails now 🙂
Thank you Crystal! Please let me know how it turns out :).
Have you seen this site? http://www.arts-in-company.com Lots of info.
I gathered the cattails, then spent hours cutting and tearing. Read somewhere that tearing is better than cutting for the fibers. Picked the parts at the bottom of the stalks hoping it would have more of the natural gum/cellulose. ?? Then threw in some tops as you suggest. It’s all an experiment. Starting with a small batch. Will soak today and cook tomorrow. In the next few days I’ll put something on my blog. Ultimately, wanted to make paper for my printer, so thinking about sizing in the vat, maybe gelatin to start. Thanks for asking! http://wildplumstudio.com/blog/
What are you making lately?
Thanks for the links!
If I were you, I would process the tops vs. the stalks separately. The stalks are REALLY tough — did you see my post here?
http://druidgarden.wordpress.com/2012/12/11/papermaking-iii-cattail-leaf-paper-a-learning-experience/
I had a heck of a time with the stalks without a Hollander blender. It didn’t seem to matter how much I cooked them down :). I beat them by hand, then jumped on them, then beat them some more….ugh. It was rough going, and I didn’t have much in the way of results, lol.
Right now, I’ve been working a lot on tinctures and herbal salves. More blog posts on those soon! I’m also learning spinning and weaving this summer, along with building an outdoor kitchen and some other great stuff :).
CK – thanks for sharing the links!
I’m not sure if you saw my 3rd papermaking post, on cattail leaf paper? Its pretty rough stuff (I used it when it was dried though, I’m not sure how the fresh green stuff will go). Regardless, I would process the heads and the leaves/stalks separately. Here’s my earlier blog post:
http://druidgarden.wordpress.com/2012/12/11/papermaking-iii-cattail-leaf-paper-a-learning-experience/
What am I making? I’m learning weaving (just bought a loom two days ago) along with herbalism – tinctures, salves and the like. I am also hoping to do some soapmaking soon! 🙂 Oh, and I just made dandelion wine–I posted about that a week or so ago!
Hi and thanks for this post!
Question about dried flowers – to avoid bleeding onto paper, you mention boiling for 10 minutes? Can you clarify what you mean – boil the flowers? I want to add whole pressed flowers or petals to the paper (after it’s poured, not as part of the blended pulp), but they always end up staining the sheets.
Thanks!
If you boil them for 10 min, you can reduce the bleed considerably. It takes some of the staining power out of them. They are staining the sheets because there are tannins and such in the flowers; those interact with the wet pulp. Boiling them for a bit reduces the tannin content and therefore, reduces the bleed.
Hi! I am new to paper making and have recently found this tutorial. I have a question about the mould and deckle though. Why is it ideal to choose fiberglass over a aluminium screen? Is it a cost or value issue, or…?
I think the fiberglass is a lot more durable and won’t rust. I’ve used mine for many, many years.
Thank you for the reply! Greatly appreciate it. Did you find it durable because you’ve used an aluminium mesh before to compare?
Yep. And the alumium mesh rusted out after about a year and a half. That’s why I switched to the other screening. You could also reinforce the entire screen with 1″ hardware cloth. That would make it pretty much industructable.
I see, I may just do that. Thank you very much.