As a practitioner of permaculture and as a druid, I am always looking for ways to work with the land to create sacred and ecologically healthy spaces. That is, to create self-sustaining ecosystems that produce a variety of yields: create habitat, offer nectar and pollen, systems that retain water and nutrients, offer medicine and food, and create beauty and magic. But conventional gardens, even sheet mulched gardens, can falter in water-scarce conditions. So building gardens long-term for resiliency and with a variety of climate challenges in mind is key. At the same time, I am also looking to create sacred gardens, that is, not just places to grow food (which is simple enough) but to develop sacred relationships and deepen my connection with the living earth. Given all of this, I developed a design for a butterfly-shaped garden that would use hugelkultur raised beds and allow for a space for walking meditation and ritual.

When I came to the new homestead late last year, one thing was clear–any gardening was going to be rough going with the acidic, heavy clay soil full of rocks. Digging down into the sunny part of the yard that was once excavated for a pool revealed virtually topsoil or humus content–basically, I was going to have to grow on clay subsoil. A soil test revealed practically no phosphorous either. Because I also have abundant wood on the property, digging down and creating some hugelkutur beds seemed like a great idea.
Hugelkutur beds were popularized by Sepp Holzer and discussed in his book Sepp Holzer’s Permaculture. They are used widely around the world as a way to create beds that are enormously productive due to their ability to create vibrant soil biology and hold copious amounts of water. The key to these beds is sinking a good amount of wood–large pieces–that slowly rots down over time. As the wood rots, it becomes a spongy mass ready to hold water.
The Hugelkultur beds certainly take some sweat equity, but they will pay out dividends in the long run. Each year that passes, more and more moisture will be held in the bed from the wood. Microbial life will flourish in this wonderful, undisturbed system of nutrients and roots. Each year with the hugels is more abundant and productive than the last as the underlying soil structure grows more connected and diverse.
Choices for Hugels
One of the challenges with Hugelkultur is doing it without heavy equipment or fossil fuels. I’ve seen people make amazing hugels using a backhoe, tractor with an attachment, etc. They dig a big hole and then use the machinery to pile up even more wood, making these enormous hugels. I don’t have knowledge of how to operate such machinery, so I was going to do mine on a smaller scale by hand. The question is–what can we do by hand, given these conditions? Can we still make abundant and productive hugels on a smaller scale?
One of the key conditions for us was the heavy clay soil–when it rained, the water pooled in the space. I thought that if we dug down, then the water would pool in there a bit, being able to be sucked up by the rotting wood. After digging out the hugels (but before wood was added) this proved to be true–the water literally just laid in the heavy clay, forming pools that took days to dry out. Yes!
Others, however, may find it more beneficial to go up rather than down–the key is to get the wood in it and get some layers of compost and such on top. Your own conditions beyond that determine a lot of how you want to create your beds. Here’s how I created mine!
Choices for Garden Design
In permaculture, one of the principles is “stacking functions.” The idea behind this is that you should try to get as many different functions out of a single space as you can. For example, the greenhouse offers not only a great growing space for fall and spring crops, but it also offers shelter from frost for seedlings, and it offers a wonderful place to hang out when it’s 35 out and you want some sun. Its multiple purposes, then, contribute to the overall goal of the greenhouse. In the case of designing a garden itself, this is also critical. The title of this blog is, after all, the “druid’s garden”–implying not only a garden but a sacred space.

And so, I think it is really important to consider the role of sacredness and design in a garden space. It’s not just a space to grow things in, to serve the pollinators and create ecosystems….but also a place of sacredness, where the act of gardening is sacred work and considered sacred practice. As is the act of being in the garden for non-gardening purposes, such as meditation and ritual. To me, making garden spaces that can “stack functions” in this way is an important part not only of gardening but of living a sacred life more generally and building connection and communion with nature.
So for this garden, I had a limited 2/3 circle space after putting it in the greenhouse. I toyed around with a large number of designs before settling on a tree of life theme. As the garden developed, I realized I didn’t just want a set of “branches” but rather a space to do walking meditation like a labyrinth, so the tree transformed more into a moth/butterfly design.
Building a Hugelkultur Walking Meditation Garden
Now that we’ve talked through both the mundane and sacred aspects of this particular garden design, let’s take a look at how to build one of these gardens!
Step 1: Observe, Interact and Create a Design
I already had a good sense of the sunniest part of the land that was near the house and easy to access; this, was where the old owners had once had a pool. It was here that I decided to place both the greenhouse and the walking meditation herb garden. I observed this space in rain and sun, and also measured it out, thought about how I wanted to move among the garden, how big the beds should be, and so on. To do this most effectively, you can get some garden stakes or sticks and then string–actually map out the location of your beds, see how it will be as you walk it, etc. If you don’t have this, some old flour also works, just pour the flour down where you want the beds to be in lines so that you are essentially “drawing” with flour.
Once I had a plan and was ready to proceed, I called out some friends to help get me started.
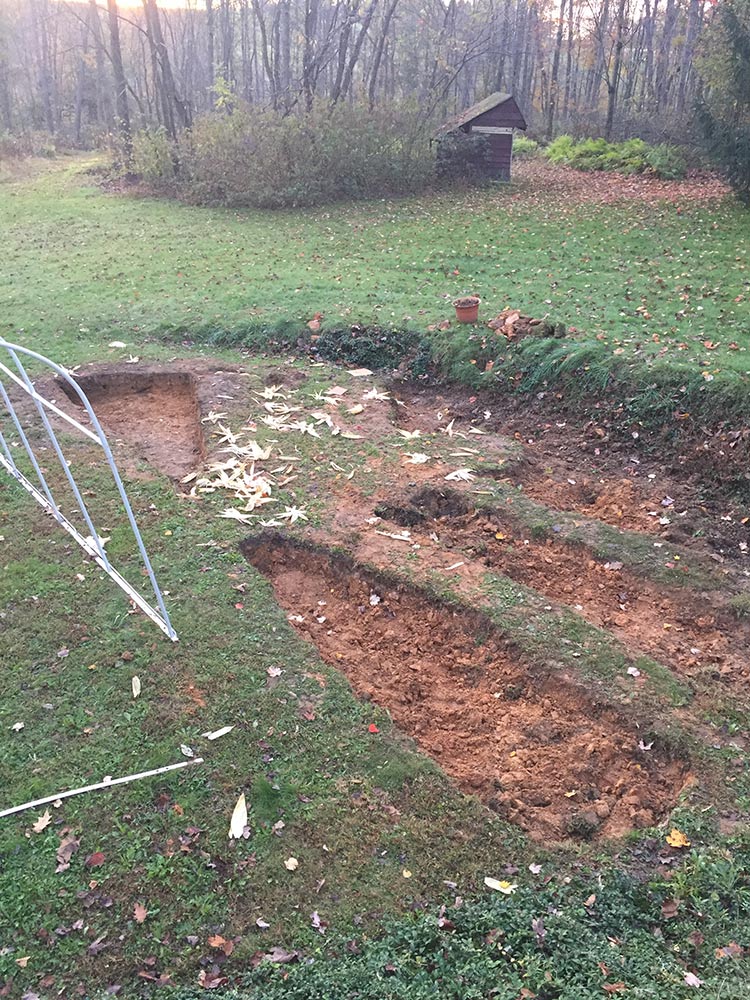
Step 2: Dig Down
I was blessed with some serious help from friends one weekend just after I moved in to help dig out the hugels. First, we had to remove a burn pit the previous owners left. Then, we dug them down about a foot and a half–as far as we could go. The clay will be used for a cob wall project(more on that later in the year) that will go in the back of the greenhouse. This doesn’t look like much, but it was literally about 5 hours of work by six people! Clay is heavy and doesn’t play nice.
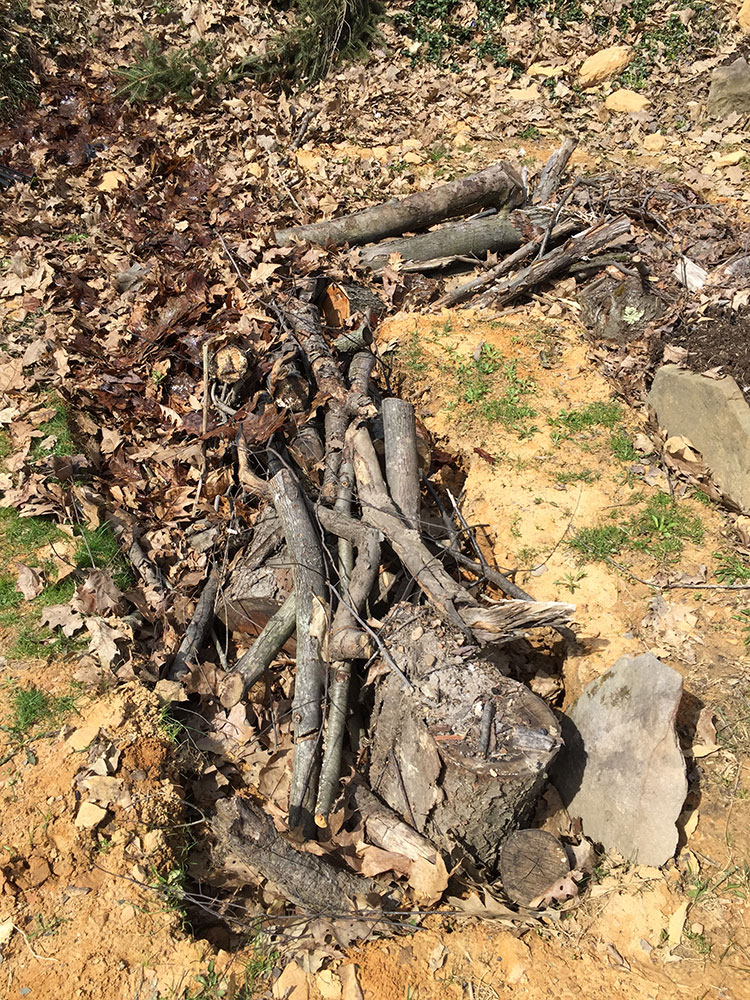
Step 3: Add Wood
The next step is to add wood to your hugel bed. A lot of it. As much as you can fit in it. Here you can see me completing one-half of one of the hugels. I used a lot of medium-sized logs, some sticks, and also large huge logs along the bottom (not all of which you can see in the photo). The bigger logs will take much longer to break down, but that’s ok!
Most wood is fine to use with hugels, but you want to avoid a few kinds. First, don’t use any woods that have chemicals that prevent the growth of other plants (black locust, walnut and ailanthus come to mind). You also want to avoid rot-resistant woods (cedar, black locust) as the point is to get it rotting down quickly. My beds primarily consisted of maple, cherry, and oak, as that was what was available.

Step 4: Add Additional Soil-Building Materials
The next stage is to cover the wood with anything else you can–any non-weedy garden waste, leaves, fresh or finished compost, manure, and so on. I threw some old pumpkins that were rotting in there, coffee grounds, a good pile of leaves, mulched grass, horse manure, and more.
In a traditional hugelkultur building, you would replace the topsoil upside down on top of the logs and keep adding more materials. The issue I have with that is that I have 100% clay, and I don’t want to have any additional clay in my beds. So I instead removed it for another project.
Step 5: Add Borders (optional)
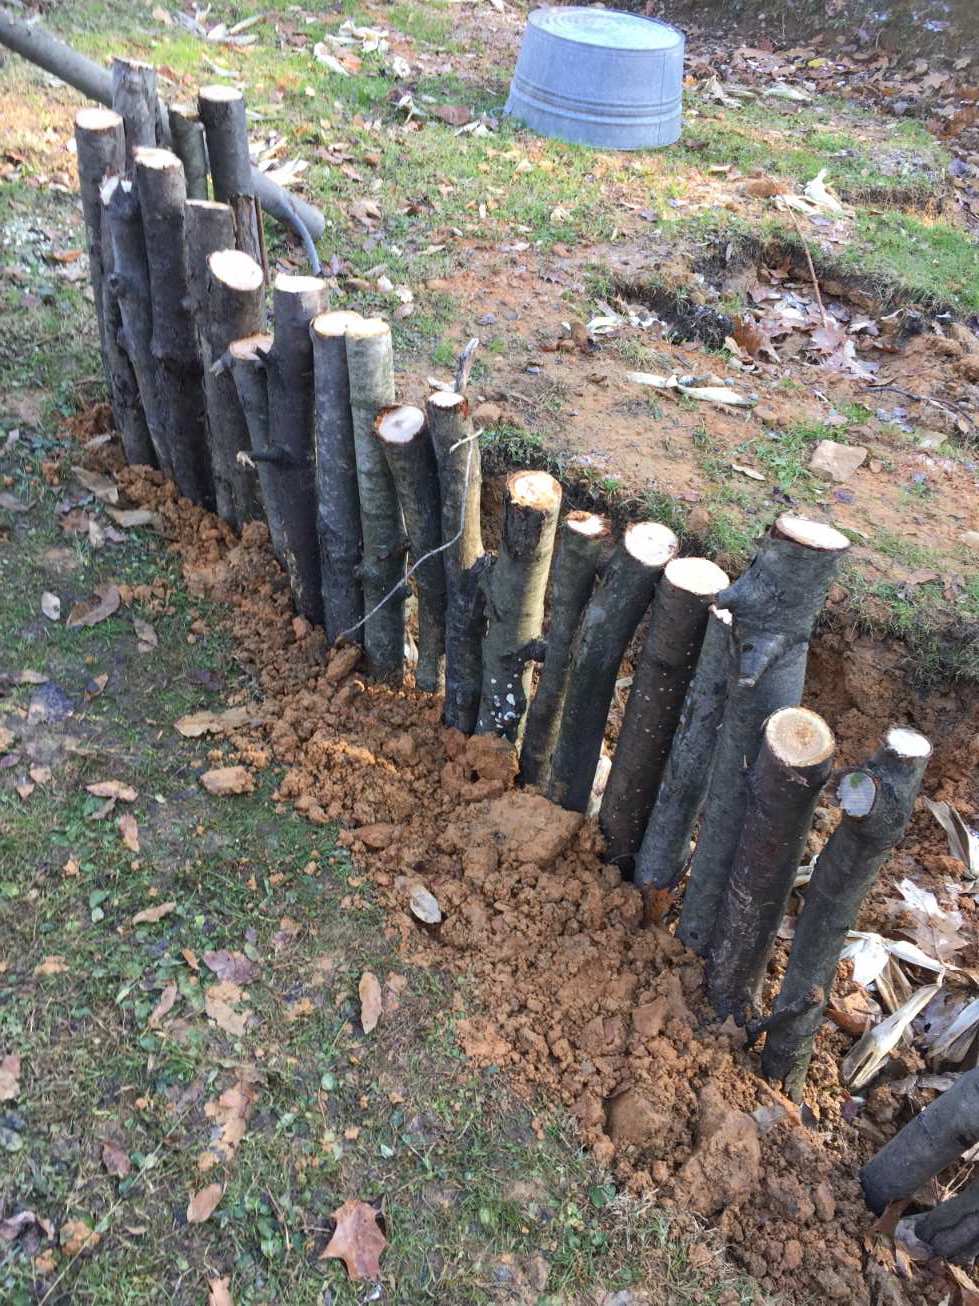
A lot of people make hugel mounds and don’t add borders, but I find that the borders are really helpful to get them higher, especially with the design I was using (which consisted of fairly small beds. Also, the borders give a clear demarkation line between what your path is and what a bed is–and for good garden design, this is critical. Paths determine garden space, after all.
After seeing my two friends who made a cool hugel garden with upright logs as borders, I thought I could do something similar. In fact, this does not work.
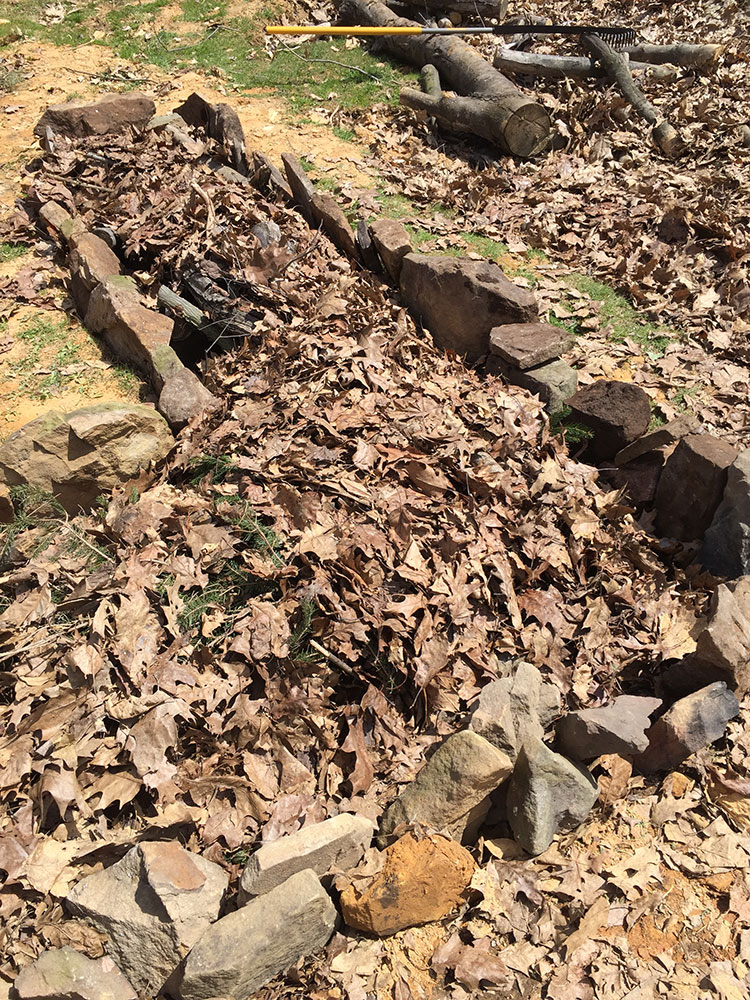
I put the logs upright and then sunk them in the clay. But…frost heaving in the winter knocked them all down. I couldn’t dig down far enough to get them firmly in the soil without some kind of auger and making them 3 feet deep… So I scrapped this idea and went to shorter beds with a rock-lined edge.
Since there is copious amounts of stone on the property (I just have to go digging and searching for it) and so I instead spent a lot of time hunting for stone on the property and moving stone for these beds. It is empowering work!

Step 6: Top with Finished Compost
The final step for the bed creation is to top the bed with finished compost–I added about 5-6″ of compost over everything and then let it rain and settle, then added more. This gives the plants you plant some room for growing. The beds, being so young, are otherwise difficult for the plants to take root. Even so, the first year of the hugels as things are just starting to rot down can be not as abundant for plants. You also want to supplement with nitrogen–as carbon starts to break down (which is what most of your woody material is) it does suck the nitrogen out of the soil. The most readily available form of nitrogen is, of course, liquid gold!

Step 7: Establish Paths
Because I wanted this to be a walking meditation garden, I needed to also think about the paths between the beds and create them with something that would last. I have done a lot of paths in the past at my old homestead with cardboard and wood chips; they are excellent choices, especially for a vegetable garden. Eventually, the wood chips and cardboard breaks down, and you end up with great soil you can move into your beds, then add another layer in. However, these kinds of paths require regular yearly or at least every-other year maintenance, and the paths quickly get lost.
But for this garden, which was more permanent and meant to also be a sacred space, I chose to use landscape fabric (which has a 20-25 year life and is breathable) and pea gravel from a local supplier. You could do a lot of things here for paths: brickwork, stonework, other kinds of gravel, cardboard and wood chips, etc. The key is to create something that you like and that fits the vibe of the garden.
So I laid the landscape fabric down and used steel pins to pin it in place. This fabric allows water to permeate but will not allow grass or other plants to grow.

Finally, I topped this with a 2-3″ layer of pea gravel (locally sourced) for walking paths.

Step 7: Plant!
The hugels can have both annual and perennial plants, trees, shrubs, etc. I opted for this garden as a walking meditation garden filled with healing plants and some food plants. There are three inlets and you can walk a figure eight or a loop in the garden and commune with the perennial plants. The garden is planted with a variety of perennials and a few annuals: calendula, yarrow, horseradish, basil, thyme, new England aster, wood betony, garlic, chives, tomatoes, chamomile, rue, echinacea, St. John’s wort, and much more!
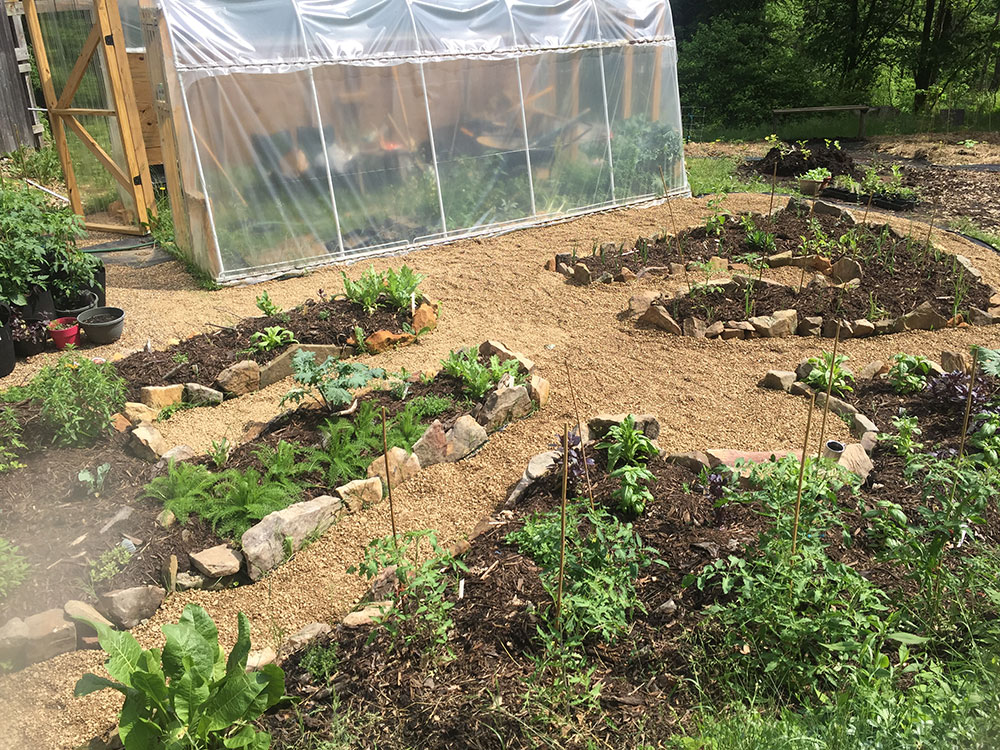
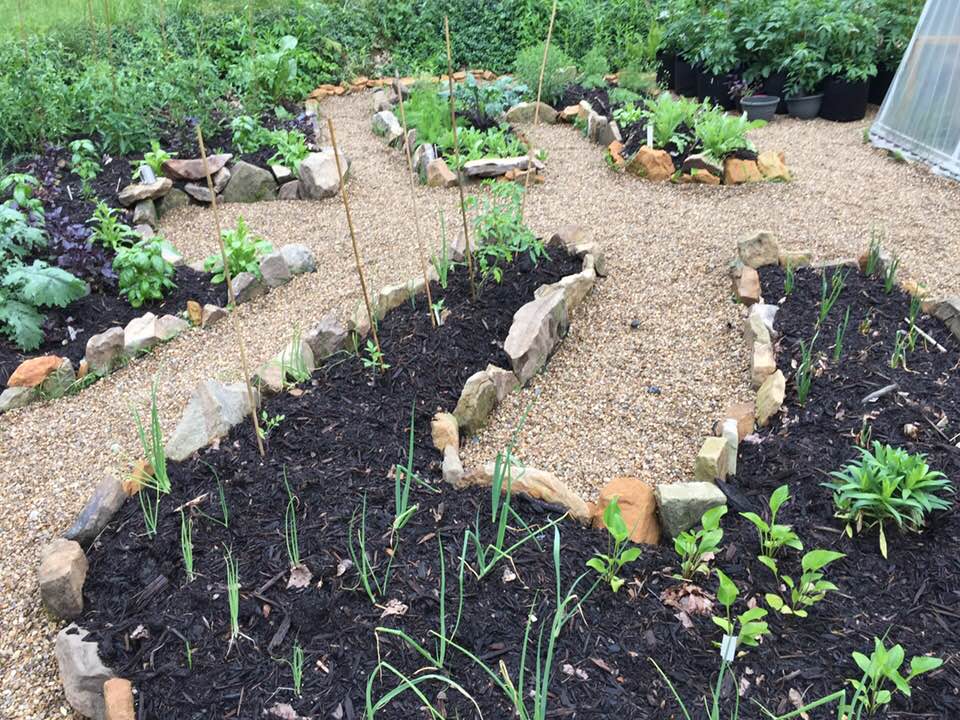
It is amazing to see how far this beautiful garden has come from the green, consumptive lawn. It will now produce food, medicine, habitat, nectar, beauty, and a wonderful space for ritual and meditation work. This is just one variation–of countless others–to combine solid permaculture design techniques with sacred gardening.


Reblogged this on Paths I Walk.
Thank you for the reblog!
Reblogged this on Blue Dragon Journal.
Thank you for the reblog!
I love the idea of a meditation garden. I’m working a large hügelkultur bed on our property. I chose a sunny area that already had stumps flat to the ground, then covered the area with cardboard which I covered with mowed grass. I then dragged logs (new and old) out of our woods and then covered them with branches and sod. I’m not finished yet as I’m 60 and disabled and my husband is very sick and on oxygen, so I am doing this pretty much on my own. The bed has turned out a bit wider and flatter than I wanted, so I am thinking I will use some rope and thread it through the underside of the bed and then cinch it tighter to pull it in. Or maybe I won’t and leave it as is. I purchased bales of straw from our local farm store to layer on next, then I have some barnyard mix from a local farmer, then I will have to add soil. Like you we have heavy clay soil but unlike you we don’t have any rocks unless we bring them in. We are located over a huge aquifer at the base of a mountain. Any rocks or boulders left by the Glaciers, have sunk to the bottom of the aquifer. My neighbor and I are also working on making a pollinator between our two lots (I surround him on three sides). We will have an arbor and path so we can still visit.
Sounds awesome! I love the pollinator plot idea as well! With these gardens, I found that just going out for 2 hours a day, every day, anytime I could all spring long helped me complete them. It certainly was a huge investment of time, but as the space took shape, it was so fun to watch. And now, seeing them grow and bloom is even more fun!
‘Another delightful and informative post. Thank you Dana!:-)
Absolutely! Thank you for reading
Reblogged this on dreamweaver333.
Thank you for the reblog!
Beautiful post! Thank you!
Thank you for reading!
Reblogged this on Rattiesforeverworldpresscom.
Thanks for the reblog!
My goodness! What a massive and wonderful project! Beautiful.
I struggle with including sacredness in my gardens because I live in a townhouse community with strict appearance guidelines. But you continually inspire me. Perhaps I can wild tend the edges of our little spot and not draw too much attention. I’m very drawn to the multi-purpose model!
I like the idea of hiding in plain sight for a situation like this. I lived in a condo for a year and that’s what I ended up doing!. It could just be a “beautiful garden” to one person and a “sacred space” to another. It doesn’t have to be full of shrines and what not–even a single standing stone would look great and nobody would know :).
I loved this article. I’m faced with similar clay
soil in Northern California. I can’t wait to start
collecting branches. How many layers of top soil did you end up adding after the first 5-6”?
– Catherine
Catherine, it goes like this:
Dig out the clay as much as you can (tiring–get friends to help!). If you have top soil you can remove it temporarily and add it back in when you are adding organic matter. I had no top soil in that location, so it was a moot point!
Add wood
Add organic matter; fresh compost, leaves, non-seeded weeds, etc
Then add the 6″ of compost to finish it off. I also added mulch.
Very helpful, Dana. Thank you.