Root Cellars: A Simple Storage Solution
As a druid gardener, I want to grow my own produce and store it in an efficient manner, sans fossil fuels. Back in the day, before people had electricity and refrigerators, root cellars were a main staple of food preservation. A good root cellar could preserve a family’s produce–including onions, apples, squash, potatoes, and carrots–throughout the winter long. A root cellar was traditionally located inside a home or nearby. A traditional root cellar uses primarily natural materials (stone, dirt, straw, etc) as well as the naturally cool and humid earth to store foods for months on end. In other words, they are highly sustainable, economical, and very practical.

Root cellars (as the name implies) are best for root vegetables and certain other kinds of fruits and veggies. Apples store surprisingly well (but need to be stored away from other veggies); potatoes, carrots, onions, turnips, and squash also all do well in a root cellar. However, root cellars don’t work for all produce. A lot of veggies require other methods of storage: tomatoes or green peppers, for example, should be canned or dried.
No Basement? No Root Cellar? No problem!
Unfortunately for 21st century America, homes aren’t built with root cellars anymore. The idea is that if you want something, you simply go to the store and buy it (often after it has been grown with heavy machinery, petrochemical fertilizers, and then shipped with petrochemicals thousands of miles to your local store). This is a serious problem and is simply not sustainable. Unsurprisingly, since our house was built in 1940, it does not have a root cellar.
When I first began searching out information on root cellars, I found lots of plans for converting a basement or portion of a basement into a root cellar. Since our house does not have a basement, (the lowest level is our den/kitchen), I had to find alternatives. Enter: The Root Cellar Barrel!
Step-by-Step Guide to Creating a Barrel Root Cellar
Materials:
1 5-gallon barrel (a larger vessel will do, such as a small trash can)
1 drill and large drill bit
Shovel
Hay bale
Place to dig
Step 1: Find a Place to Dig

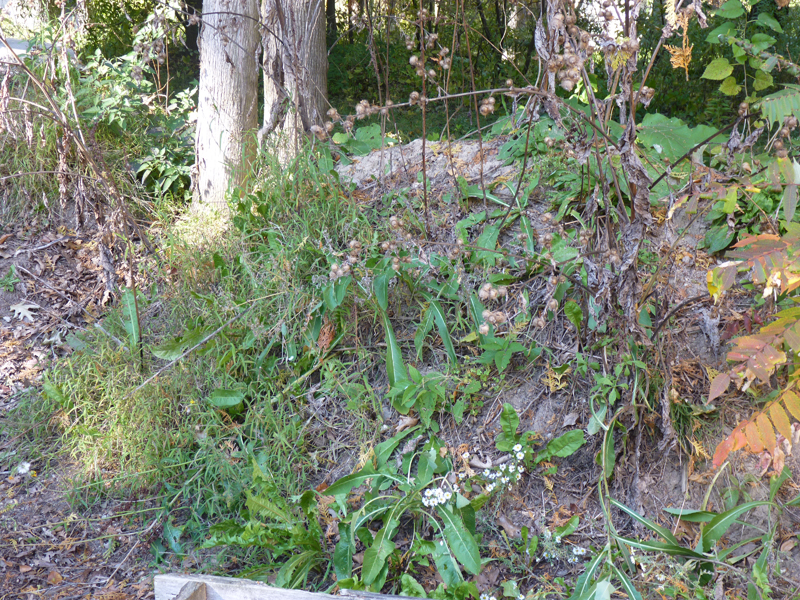
A root cellar barrel should be in a shady area on a north-side of a house or north facing. This is because you want to keep your veggies as cool as possible, and the North traditionally gets the least amount of light. (You’ll notice in the photos that I put my first root cellar barrel facing the south accidentally–bad idea!). I have some piles of dirt behind my garden that are about 6′ high and have been there for a number of years. I chose one of these to put my root cellar barrels in.
If you don’t have a mound of dirt or hill, this is fine–you can still build a root cellar right into the ground. But you want to be careful that you are not going to have water table issues. Part of the reason I chose this nice mound of earth is that in the springtime, the entire area around my garden can get very saturated (which happens with prolonged rain). In other words, my root cellar would be flooded! This would not be good for my potatoes.
Step 2: Assemble Supplies

Once you’ve found your location, assemble any supplies you need. I chose to purchase a new plastic bucket at a local home improvement store. I had salvaged some buckets from along the road, but I decided against using them since I had no idea what had been in them previously and I was planning on eating out of my root cellars for many years. Whatever you use, make sure you have a lid that seals.
Step 3: Drill Some Holes
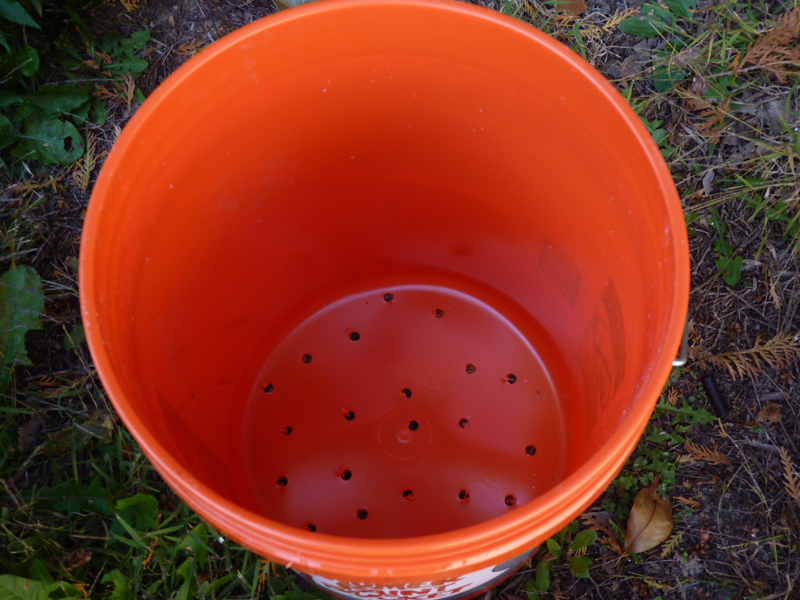
One of the reasons that root cellars work is that they use the earth to regulate the humidity level. To do this, your veggies need at least some contact with the earth (don’t we all?) I used a large bit and drilled a number of holes into the bottom of my bucket, as shown.
I’ve also seen instructions where they suggest cutting off the entire bottom of the bucket–either approach is fine.
I chose to drill them into the bottom rather than the sides because I thought there would be less chance of bugs getting into the bucket. So far, so good.
Step 4: Dig Your Hole
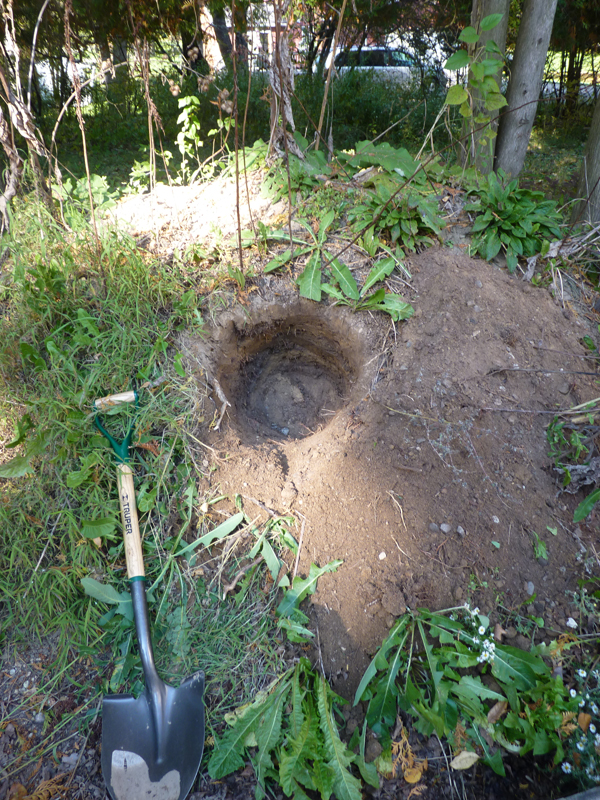
Now its time to dig your hole! There’s not really much to it. Just dig a hole big enough to hold the bucket. Its pretty straightforward. Its so easy to do this, you might dig a few while you are at it….

Step 5: Add your bucket to the hole
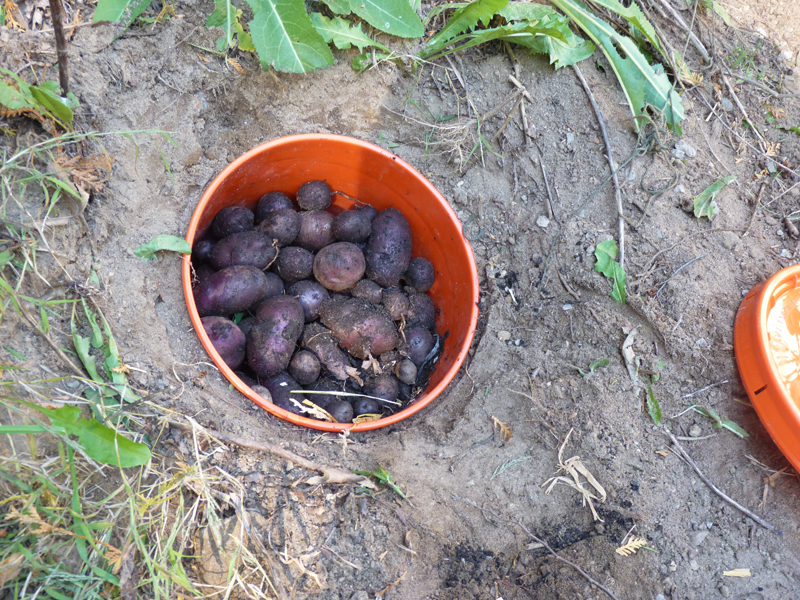
As you dig, check the size of your hole against the size of your bucket. Once your hole is large enough, place your bucket in the hole and use the excess dirt to fill around the edges. You also don’t want dirt to keep falling into your hole, so you want your bucket to stick out an inch or two from the ground (as shown in my next photo).
Step 6: Add your veggies

At this point, you can go ahead and add your veggies. For a bucket this small, make sure your veggies get along (e.g. apples and potatoes do not enjoy each other’s company in root cellars). In my case, I had a ton of potatoes so this whole root cellar bucket was full to the brim of my lovely heirloom blue potatoes.
Please note: for most veggies, you should not wash them before you put them in the bucket. Washing them can pull the moisture out of the veggie. So just store them as they are as you dig them out of the ground!
Step 7: Top with lid and add straw for insulation
At this stage, all that you have left to do is close the lid, make sure its sealed, and add a hay bale or straw bale on top of the bucket. When the cold winter months come, this will help keep the contents of the bucket from freezing.
Step 8: Enjoy!
Now that your root barrel bucket is done, you can enjoy fresh veggies anytime you want. Even in the middle of winter, you can dig down into the snow and open up your root barrel to get at your garden-fresh produce.

A Year Later:
I’ve been using the root cellar barrel for one year now, mostly for potatoes. It lasted throughout the winter with sub-zero temperatures; the potatoes did not freeze. Anytime I wanted some potatoes, I just dug out the hay bale and pulled out as many potatoes as I wanted. In the spring, in about April, I pulled out the last few potatoes and they soon went into the ground for this season.
So yes, this design works, at least in my South-East Michigan (Zone 6) climate!


A second update. A full year went by, and we continued to have wonderful veggies. When the warmth in April came, we pulled the remaining potatoes out and put them in the ground for this year’s harvest. So all in all, this root barrel was a HUGE success! I’ll be building more this year :).
I live in Southern Calif where heat is the enemy. Do you think this would work here in zone 8-9
Yeah, the earth keeps a constant temperature that is always somewhere between 40-70, even in hot climates. I think if you went down far enough, it could definitely keep things cooler!
Fantastic idea! I’ve been longing for a root cellar, but I live in metro Detroit in a home with no basement and a small backyard (which is mostly garden!) I’ve put off growing things like potatoes as I had no where to store them. I’m definitely going to try to barrel technique – I’ll mound up some dirt on the north side of my shed and see how it goes. Thanks for the great idea!
Barbara, since I also live in Metro Detroit, I know this works well for the region :).
Thanks for the comment :).
Have you had any issue with your barrel popping out of the ground during the winter since it isn’t below the frost line? I’m concerned about that as I wouldn’t want to lose my root vegetables.
No. The biggest issue I’ve had is not sealing it properly after I get something out of it in January. I had one of them not seal properly and water got inside….
Grew up on a farm in North Florida. Water table was very high so we used mounded dirt on top of the surface. No bucket, just a layer of hay, then build a little teepee of boards over the potatoes or rutabagas another layer of straw then pile the dirt around it. Need potatoes, just go pull one board up and reach in.
Awesome! That would totally work in a high water table. I’m sure the soil kept the potatoes cool. The bucket is good for northern climates–otherwise everything gets frozen. Usually the haybale and bucket means you can still uncover it, even in the snow :).
[…] old-school homesteader trick, burying a heavy-duty bucket with a lid is a great way to […]