
Samhain is here, and with it comes a time of reflection, casting away, and working with our ancestors. In my post several weeks ago, I discussed in great depth the ways of working with various kinds of ancestors–in this post, we’ll explore a bardic art project that you can make to work with your ancestors: an Ancestor Oracle. This was an idea birthed by a friend of mine and I on the drive back from the OBOD East Coast Gathering this year. We spent hours in the car talking about all kinds of things, and one of the things that came up was a conversation about working with the ancestors–by the end of the conversation, we had both decided to construct an Ancestor Oracle in time for Samhain this year. I thought others might also like to construct one of their own, and so, this post will tell you what this is about and how you might create one.
The basic concept of the Ancestor Oracle is simple: you generate a list of your ancestors (however you conceive of them): ancestors of blood, land, and tradition, those others whom you have loved and lost, human or otherwise. Then, you either create a deck of cards (which this post describes), get printable blank cards or purchase a blank deck of cards. Each ancestor or group of ancestors that you want to represent is giving their own card. Each person’s ancestor oracle would, of course, be unique to that person. The Oracle itself can be used in a number of different ways including divination, honoring ancestors, celebrating Samhain, and grieving lost loved ones.
Selecting Ancestors
Before you construct your deck, you will want to spend some time making a list of the ancestors you want to acknowledge. Samhain is a particularly good time for this kind of work. For me, I included ancestors of blood, tradition, and land all within my deck. Some of them ended up as a group, like “The Ancient Druids” (because I don’t know their names) while others (like Iolo Morganwg, Ross Nichols, and Juliet Ashley–three important figures in my own druid heritage) were named specifically. I also included, of course, a range of loved ones and family members who have passed on. I found that this work took time–I had to compile my list, come back to it over a period of days and spend some time meditating upon it.
Doing this in advance is important to know: do you have 100 different ancestors you want to represent or just 20? That will help you get a sense of what kind of supplies you need and how many cards you want to create. The Ancestor Oracle is, by definition, an evolving project (as I’ll discuss in the next section), so you’ll want more cards than you need at present.
Using your Ancestor Oracle
Once you’ve made your Ancestor Oracle, you can use it in a variety of ways. For one, an oracle is like any other divination system: you can seek wisdom and guidance from it as you would with the Tarot, Geomancy, and so forth. You might ask a question and draw a card, connecting with that ancestor and the advice or wisdom that they/he/she shared. If facing a difficult situation, you could draw a card and think about the kind of wisdom that particular ancestor might embody.
You can also use it for longer-term ancestor work. What I have been doing since creating mine two months ago is drawing a card each week to place on my altar–this shows me which ancestors I can attend to this week and what wisdom they share. Given that this is the period of time where ancestor work is done, I think I will make this a yearly part of my own celebrations of this time: for the months of August, September and October, I draw a weekly card and work with that ancestor, leaving the card on my altar for the week.
A third way you can use the Ancestor Oracle is for an ancestor alter. Now that we are at Samhain, I have laid out all of my cards on my main altar to honor my ancestors. I will probably leave them there till Alban Arthan (Yule). This altar the place where I do my daily meditations, Sphere of Protection, prayers, etc, so they are there and present with me. Seeing the cards there, each day, has been a very profound experience and has really helped me to better connect with my various ancestors. Especially the ones of my tradition, whose words and work I embody as a druid each day.
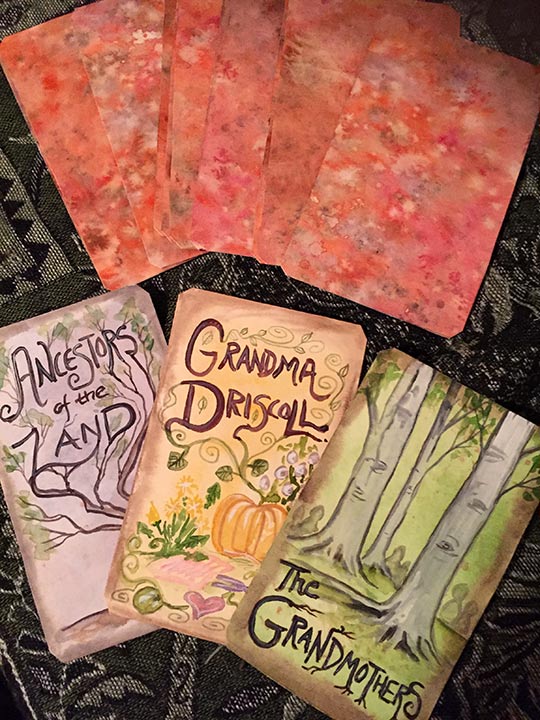
A final way I plan to use the ancestor oracle is with grief and remembrance. When I constructed my deck, I made many more cards than I currently have ancestors. The truth is that I have been looking for some additional ritualized way of grieving a lost relative or friend, and the ancestor oracle offers me this way. When someone I know and love crosses over the veil and joins my other ancestors, as I go through the grieving process and come to a place of acceptance, I will add them to the ancestor oracle and honor them in a ritual way. I feel very good about this use of the deck, and know it will be a powerful healing tool. I suspect that there are a lot of other possibilities for using an Ancestor Oracle–if you have any, please share!
Some Options for Creating Your Oracle
Now that we have some sense of what an Ancestor Oracle is and how you might use it, let’s get down to how you can create it. I recognize, of course, that not everyone has cultivated visual art skills, and so, some of you might be looking for a route that you can manage. That said, there are a few routes you could go to make this deck. Here are four such options:
Option 1: The route I took and will describe in this post, is to break out the art supplies and make some kind of artistic deck. Since I am a visual artist, I made a watercolor deck. I’m going to show you how to do this method (instructions in the 2nd half of this post), and even if you have very little practice or skill at present, you can still make a deck that speaks to you using basic watercolor wash techniques that anyone can do.
Option 2: My friend ordered a set of ready made blank tarot cards and wrote the names of each of her ancestors on them–this is a wonderful idea. You can write in a normal script or try something fancy. You could also paint them with acrylics. Even a chisel point pen, like that used for calligraphy, would give a nice touch.
Option 3: Another way you could make this deck is by printing out pictures or using a photo editor to actually visually represent the different ancestors. Taking it to a local print shop and having it printed and cut wouldn’t be too expensive (or you can order blank printable cards to do at home). I would talk to the print shop about what they are capable of before you went this route. Or you could get the photos themselves and even cut them to size and adhere them to a playing card deck. The possibilities for using photos to make your oracle deck are numerous.
Option 4: You don’t have to make an oracle with cards; you could make it with objects. Find one small object that represents each ancestor, put them in a nice cloth bag, and your oracle is born!
Option 5: You also could make your oracle out of something other than cards: you could woodburn wooden rounds, you could carve wooden rounds, you could paint on rocks, create polymer disks, and so forth. The sky is the limit!
Instructions to Create a Watercolor-Based Oracle
Now that I’ve covered the ways you might use this deck and what its overall purpose is, I’m going to walk you through a simple way that you can make your own beautiful ancestor oracle deck using watercolors. No painting skill is required to create this deck (I promise!), but you will need some supplies.
Supplies
You should be able to get all of these supplies for under $30 or so of at a local craft/art store or borrow from an artist friend:
- 140 lb watercolor paper. The weight is important here–you want a weight to your finished cards. Weight of less than 120 isn’t going to be thick enough. Often, art supply stores sell single sheets of watercolor paper that are 22″ x 30″ in size for $3-$7–this is a great idea and is what I used for my deck. Otherwise, a watercolor pad will be fine. Watercolor papers have different “tooth” or roughage; a more rough paper will give you more interesting textures than a smoother one.
- Watercolors. Any watercolors, even a pan of children’s watercolors, will work for this. Having a variety of colors is helpful but even a few colors will work. The colors will, of course, determine the final product.
- Brushes. You will need a 1″ or larger brush as well as a smaller brush for lettering and splattering paint. Here’s a tip: professional artist paintbrushes can be kind of pricey–but if you go to where they sell house paint (like a home improvement store) they sell really nice brushes there for half the price.
- Scissors, a box cutter, paper cutter, or X-acto blade to cut your cards out.
- Pencil
- Ruler
- Paper towels or newspaper for your surface. This is a messy project!
- Jar of clean water for wetting your paints and cleaning your brush
- Plate for mixing watercolor colors (optional but useful)
- Chisel point/Calligrapher’s pen for writing names
Creating your Card Background
Now that you have your supplies, we are going to do this project in two steps. The first step is to create the background of the cards. The background should be somewhat uniform.
First: Lay down some newspaper or paper towels on your surface. For one, this is messy and for two, you don’t want too much paint getting on the other side of your paper. I didn’t do this, but I was working on dedicated art studio space. Get your supplies ready to use.

Second: Now, you will need to decide a color combination for your deck. I went with colors of the harvest–browns, oranges, yellows–the colors of fall leaves. Because Samhain is a time of the ancestors, I wanted to embody the colors of this season here in my part of the world.
Third: Now, get your paints wet (assuming you have dry pans of paint). If you are working with tubes, understand that wet watercolor in tubes is *super potent* and you will need only a little bit.
Fourth: Now, wet your full paper with water; getting it fairly saturated is a good idea. Its OK if its a bit drippy.
Fifth: Layer a few colors onto the page, giving it a good amount of color (depending on how you want it to look). The colors will likely run, and this is a good thing. The paper may also bunch or curl a bit–this is ok (we didn’t stretch it).

Sixth: Now, here’s where time and chance come in. Watercolors have a mind of their own, and they change and spread as they dry. To make this background, you can take advantage of this. While the original base layer is still wet, get your smaller brush full of color, and hold it about 3-6″ over your paper. Hit the brush to your other hand and the color will splatter nicely. Splatter the second color all over.

Seventh: Repeat this with several other colors. Then, give it 5 min to dry, come back and do it again, and repeat that process. I layered about 8 or so slightly different color layers onto my page as the base layer slowly dried.
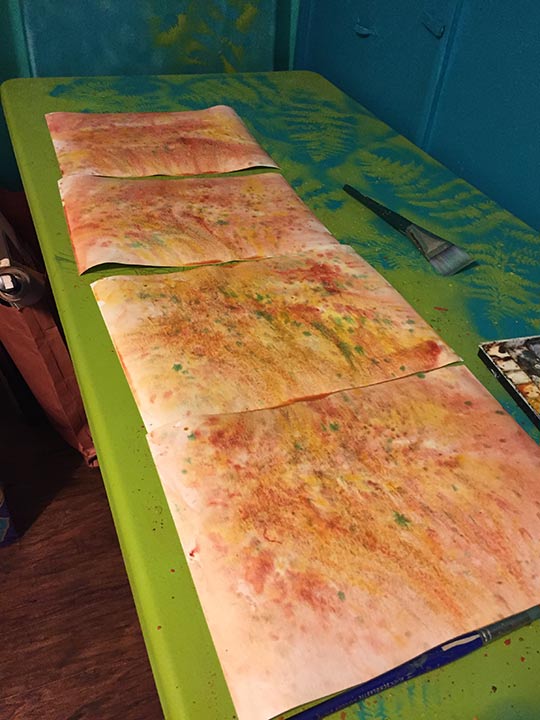
Eighth: You can also use plain table salt or sea salt to add a wonderful effect to your card back. The salt should be the last thing you add to the page–it makes something that looks like snowflakes on your page by sending away the pigment from where the salt grain fell. I really like the effect. Before you add your salt. check to see if there are any particularly large pools of water–you might want to sop them up with your brush (we are going for a consistent background look, and pools of water can make things less consistent).

Just sprinkle a little bit, on the pages, like you are salting your meal. Then, give it time to completely dry.
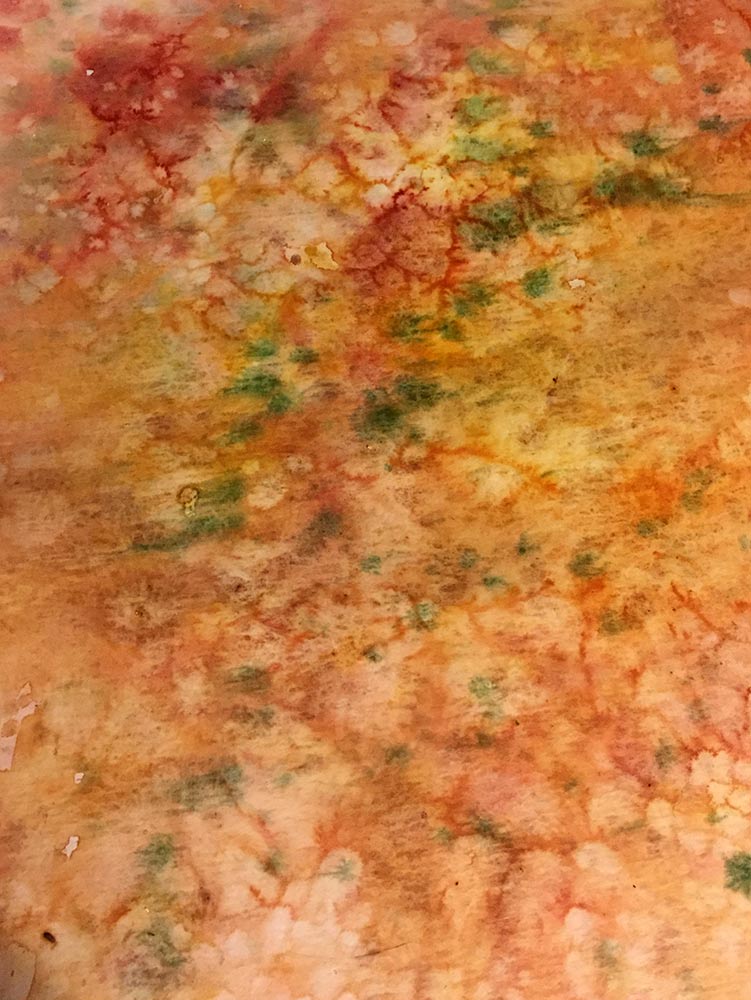
Finally: Let the sheets fully dry (you can use a hairdryer to speed things up if you really want) and proceed to the next step.
Creating the Card Fronts
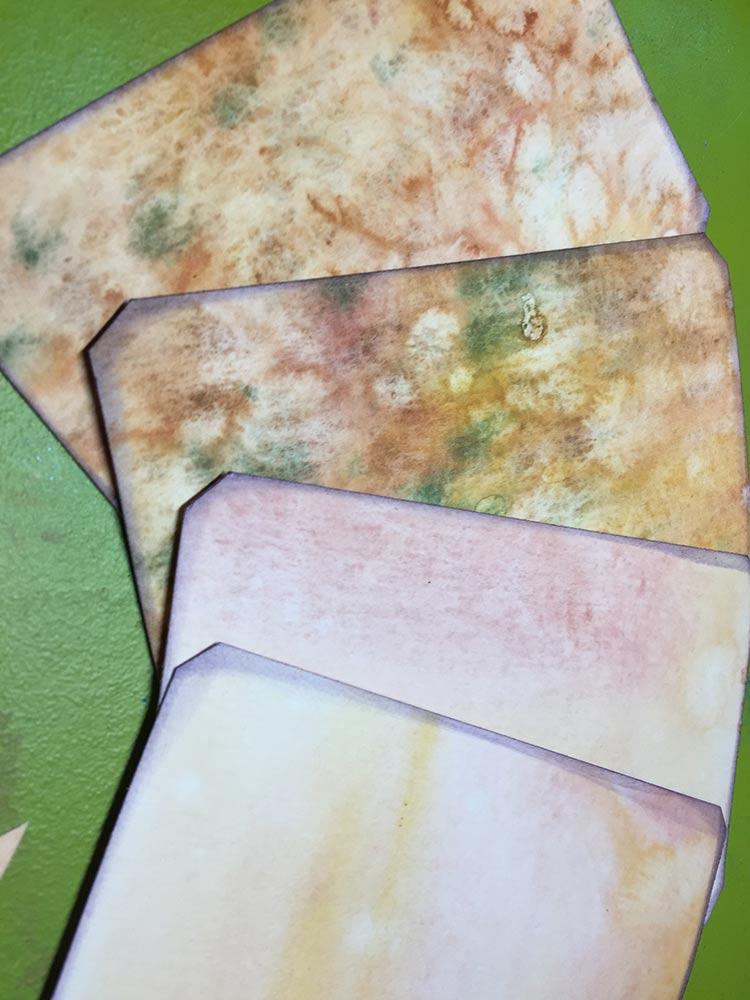
For the card fronts, I am going to suggest that you do a simple watercolor wash (1-2 mixed colors, using steps 1-5 above). You can choose to do the same color on the entire front for consistency of cards, or, if you’d like, you can cut them and then do a different color wash on each card. In other words, if you want them all to be uniform, you can do the watercolor wash, let it dry, and then cut it up. If you want the cards to have different colors, cut them up first.

The easiest way to cut them up is to measure and draw lines in pencil to whatever size you want. There are certainly common sizes for tarot cards (like 3.5″ x. 5.5″) but since this is your deck, you can make it whatever size you want–even round! The other option is to make one card as a template and then use it to trace out all of the other cards. If you want them round, just get a cup of the right size and trace the cup onto the sheet and cut them out. Or you can use a paper cutter like I did.

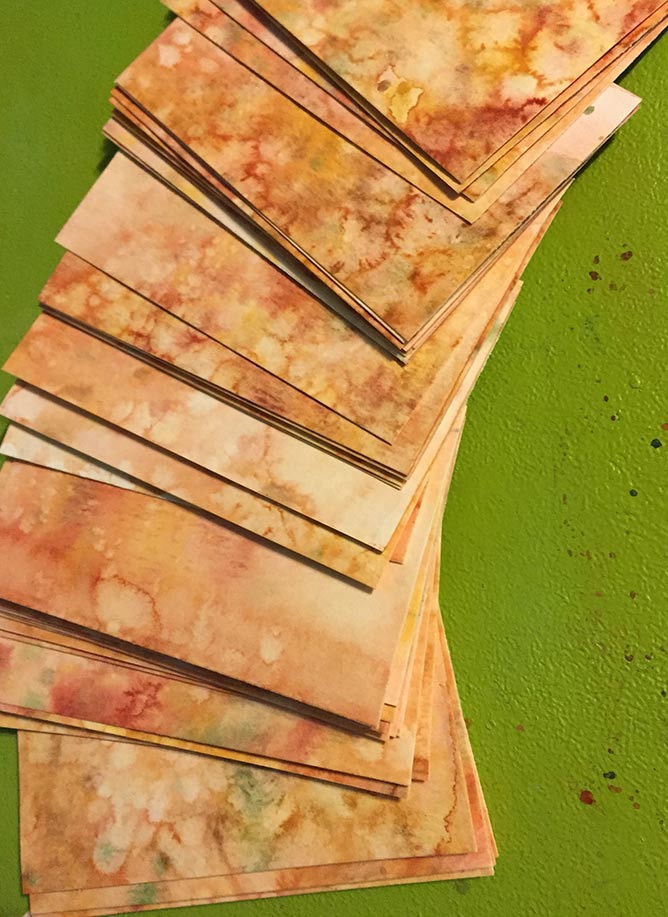
Once you have your cards cut and have done a watercolor wash on the card fronts, you might want to snip the edges to keep the card nice (or if you are a scrapbooker, you might have one of those fancy card rounders!)

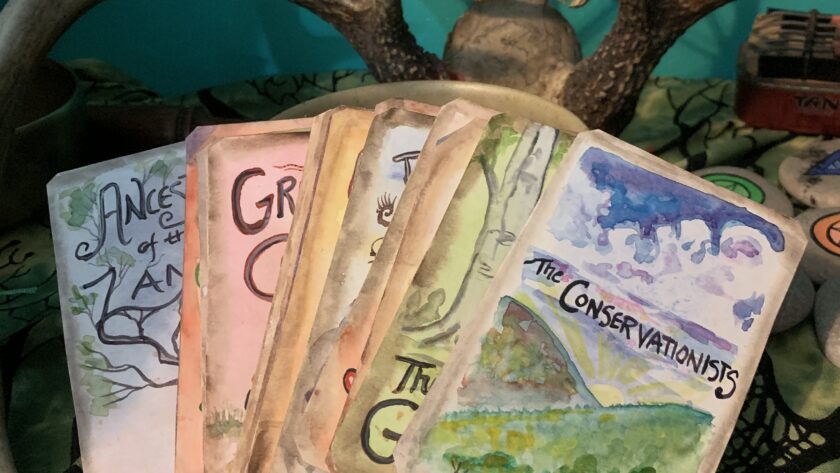
You can finish the cards by adding the names of your ancestors, one per card. If you get a nice chisel point pen (like the kind calligraphers use) it will make your writing look really nice, which is an added touch.
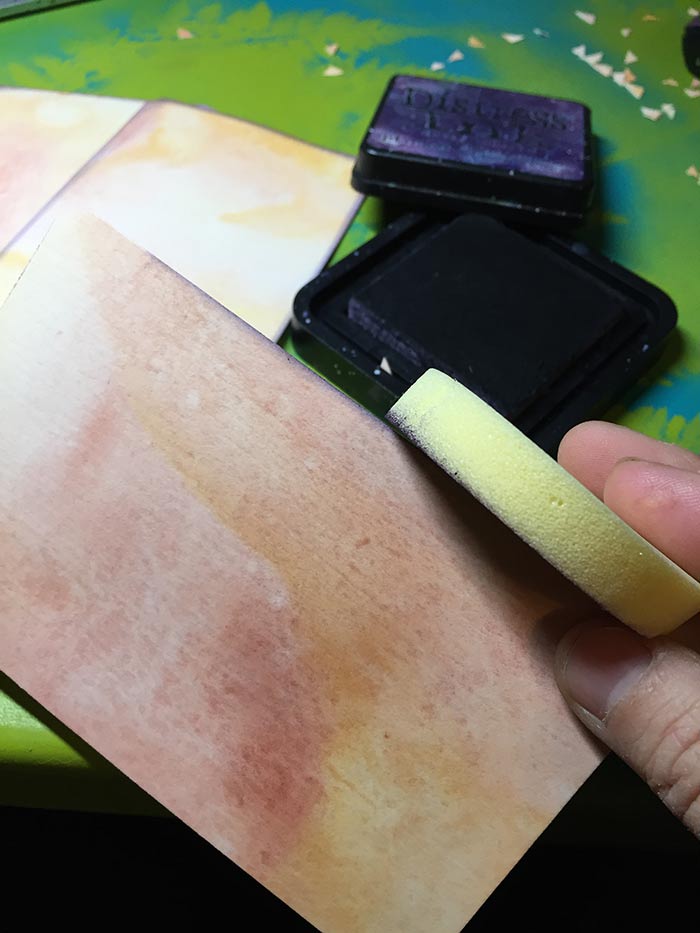
If you’d like, a nice technique to finish the edges of the cards is to darken them. To do this, take a black ink pad and a makeup sponge. Dab the sponge onto the ink pad, and then rub it gently over the edge of the card on both sides (If you haven’t done this before, consider practicing it before you go ahead and do it!). You’ll have a darker edge and a border, which gives the cards a nice complete look.
I also chose to paint a symbol for each of my ancestors like freshly baked bread, a rocking chair, etc. That was my way of connecting to the ancestor not only verbally but also symbolically. If you are uncertain of your drawing ability, you can also print and cut out a picture or other graphic that can be glued to the card. If you are going to glue anything, I strongly suggest using a bookbinder’s glue, like Yes! Paste or even one of those little kids paste pots or glue sticks. A lot of glue (like Elmers) has too much water in it and will make a lot of wrinkles as it saturates the paper of whatever you are gluing.
I hope you found these instructions helpful. May the ancestors be with you this Samhain and blessings upon you during this sacred time.


Thanks so very, very much for this inspiration. I’ve done genealogy research for about 50 years, and feel drawn to some of my ancestors without knowing why – yet. I appreciate your notes and the work you’ve done. What an appropriate day to release this practice!
Brenda Jenkins Kleager
What a great idea! I really really love this. Thank you so much for sharing, this was a very insightful post.
Reblogged this on Three Rivers.
Hi Dana,
Thanks for the inspiring post. I am making Ogham Few cards for some family members as winter Solstice presents and will incorporate your ideas into the new decks.
Hugs from Max
Reblogged this on Rattiesforeverworldpresscom and commented:
Sounds brilliant:)
Love this and the cards are beautiful. I can’t wait to create my own. Sharing this!
Once again, thank you Dana. This will require much thought but I look forward to the result.
[…] Creative Expression: This inspiring and super creative way to honor ancestors of blood, tradition, and land […]
Thanks for the link!
Reblogged this on Gentle Ignition and commented:
What a wonderful post! A good family project? I am archiving it on gentleignition.wordpress.com if you don’t mind. Ans thank you for all the work you undertook to make this post.
Option 4 sounds like throwing the bones…
Yep, in some ways it kind of is!