This is the last post (for a while) in my series on wildtending. In the last month, we’ve explored the philosophy of wildtending as a sacred action, explored the refugia garden principle, I shared my own refugia garden preparation and design, and finally, we are ready to start scattering the seeds! Perhaps these seeds were gathered from the wilds, given as a gift from a friend, or perhaps, they were gathered from a refugia garden. Wherever you get them, now is the time to begin to scatter these amazing little balls packed with life, love, and magic.
Seed balls were invented by Fukuoka and described in the permaculture classic, One Straw Revolution. They have a number of benefits over other methods for scattering seeds. First, and foremost, they are easy to throw and toss into spaces you can’t reach. A lot of guerilla gardeners use them in urban spaces as part of rewilding activities. Similarly, I have found it so much easier to have a bag of seed balls with me and begin tossing them, seeing where they land and if they can grow. I also like them because you can imbue them with some magic (even using some of the earlier energy methods I described with minor modification). They also give the seeds a bit of nutrition to help them grow, and the ball itself creates a little platform for the growth of the seed as the clay and compost spreads out and as the ball breaks down. There are two downsides–first, roots and larger nuts need separate treatment (obviously; I usually plant these directly by hand), and second, the seed balls can be a bit heavier than tiny bags of just seeds. But I have found them to be extremely useful to have in my foraging bag or crane bag when I’m out and about in the world! So here we go–Let’s roll up our sleeves, find a few friends, and make some seed balls!
Designing Seed Balls
There are three pieces to seed balls: seeds, clay, and compost as well as some simple tools to work with. We’ll talk about each of these in turn. A bit part of making seed balls is ethical sourcing–if done right, you shouldn’t have to buy anything (or much of anything).
Get Some Seeds
The first step is to get some seeds. Deciding what to put into a seed ball depends on what you have access to (like in my case, see below) but also what you want to spread–see my first post in this series for suggestions of endangered and at-risk medicinal plants, for starters. You can spread whatever seeds your ecosystem needs–I’m focusing my energies right now on medicinal plants and tree seeds. You can gather these in the wild when they are in abundance or you can start growing the key plants in a “refugia garden” as I described in a recent post. Or you can find them in…other ways. Since my garden is still in process, I was in search for seeds this summer. In my last post, I gave some lists of potential plants for different ecosystems–check out this list for more ideas about seeds to spread, but I would strongly suggest studying up on your ecosystem and thinking about where you might share these balls. Searching out seeds is a longer-term process, something to keep in your mind for the upcoming season!

Despite the fact that I didn’t find hardly any New England Aster or a few other key plants, like Blue Vervain and Echinacea upon my return to the northern Appalachians, I stumbled across a native plant garden at a local park. And, even more delightfully, they had just trimmed the garden back for the fall, and there was a pile of plants there just going to seed in a pile waiting to be carted off…and so…well, I helped myself. This gave me a wonderful set of seeds–here are a bunch of the aster seeds drying. I also found an abundance of milkweed, boneset, and swamp milkweed to round out my stash. Perfect.
I decided, given my delightful treasure trove of full-sun seeds, to make a set of seed balls geared toward medicinal, hard-to-find perennial plants that grow in full sun.
Finding Your Clay
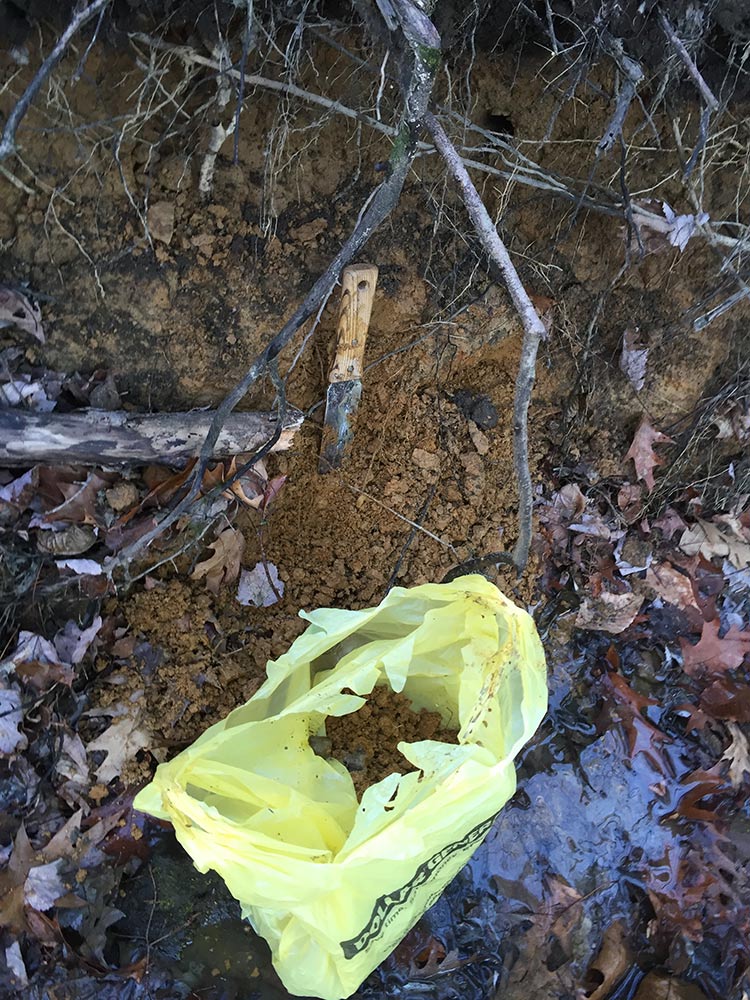
Now in his book, Fukuoka used a local clay, “red clay” and there’s been some discussion in various permie forums on whether or not “red clay” is necessary. No, it is not–any LOCAL clay will do. Please, please, please don’t go buy clay unless you have none in your local ecosystem (and chances are, you do). In most places on the planet, clay will be part of your natural subsoil, and it’s just a matter of finding some. Look when people are digging holes into the subsoil, look at eroding banks of rivers after flooding, look at new construction–you will see it. Its heavy retains water and is sticky. The reason I say don’t buy any clay is that its very fossil fuel-intensive to ship due to its weight. In PA and in Michigan, when you dig down, you can easily find clay. I prefer to dig mine out of banks by streams or the side of the road. I knew of a wonderful bank by a forest stream, so I went on a hike to get some.

I used my hori hori to dig my clay; the hori hori is a Japanese garden tool and is my favorite foraging tool. To dig your clay, literally any little trowel or shovel will do. Since I’m digging it from a soft bank, I primarily took clay from the bottom of the bank where it already had spilled over to prevent further erosion. I used a doubled plastic shopping bag to put the clay in. After digging, I put it in my bag and lugged it 1/2 mile back up the mountain :). Of course, not a week later, I saw a bunch of clay deposits on the side of a backcountry road, having been dug up from last year’s plowing. Ah well!

I pretty much got as much clay as I could carry up the mountain all that way, or about 25 lbs. The recipe I’m going to give you is based on simple ratios, so however much you get is fine.
Other Supplies You’ll Need
Before you set about making your seed balls, you will need some other supplies. I should also mention that seed ball making is VERY MESSY and should, at all possible, be done outside or in like a dusty garage or something.
Compost: In addition to clay and seeds, you’ll need some sifted and finished compost or topsoil (something seed free). Chicken-created compost, as is any home compost or worm castings. Any rich soil will do. If you think you have unwanted seeds in the soil that you don’t want to spread, you can bake the compost at 350 degrees for 10 minutes (but this may kill off other microbial life, so be warned).
A large plastic bucket is necessary for mixing. A 5-gallon bucket works well.
A bucket of water for cleaning your hands and adding water to the mix. If its cold outside, make it warm water!
An old towel is also a good idea for cleaning your hands.
A small tarp or large garbage bag. This will be for sorting out your clay, adding your seeds, and so on.
A few friends. Good friends make seed ball-making fun!
The Process
The process is simple enough, and I took photographs of each step to help you along. The first thing you want to do is to make sure your compost and your clay is free of debris, woody material, leaves, or stones. Since my clay was wild clay, we had some sorting to do. It was a little wet, but that was fine. It could have been a little dry as well. If your clay is super wet, you might want to lay it out for a few days to dry out a bit before starting. The key is finding that “just right” texture that is more on the dry side than the soupy side. Most clay you dig right out of the earth will be a perfect consistency.

We took out the big lumps, sticks, and rocks.
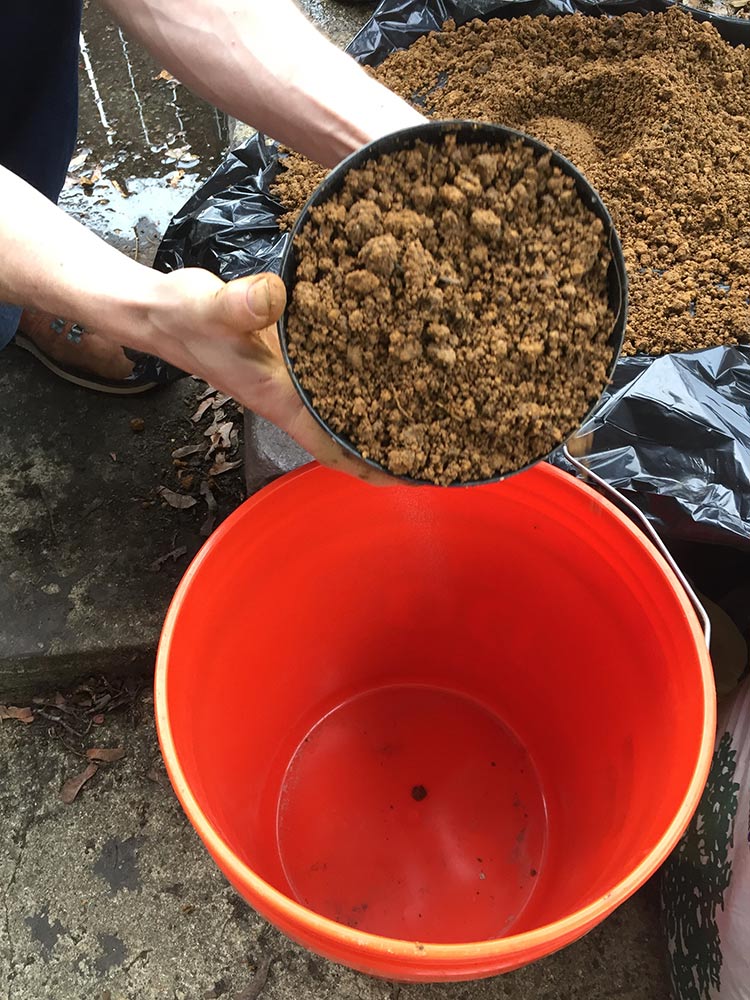
Next, you’ll want to measure your clay. You want to use a ratio of about 2 parts clay to 1 part compost–enough to form nice balls. Part of this will depend on the kind of clay you have (and if it is pure or has anything else in it, like a little bit of sand). We used a flowerpot to measure out or clay (2 parts clay).

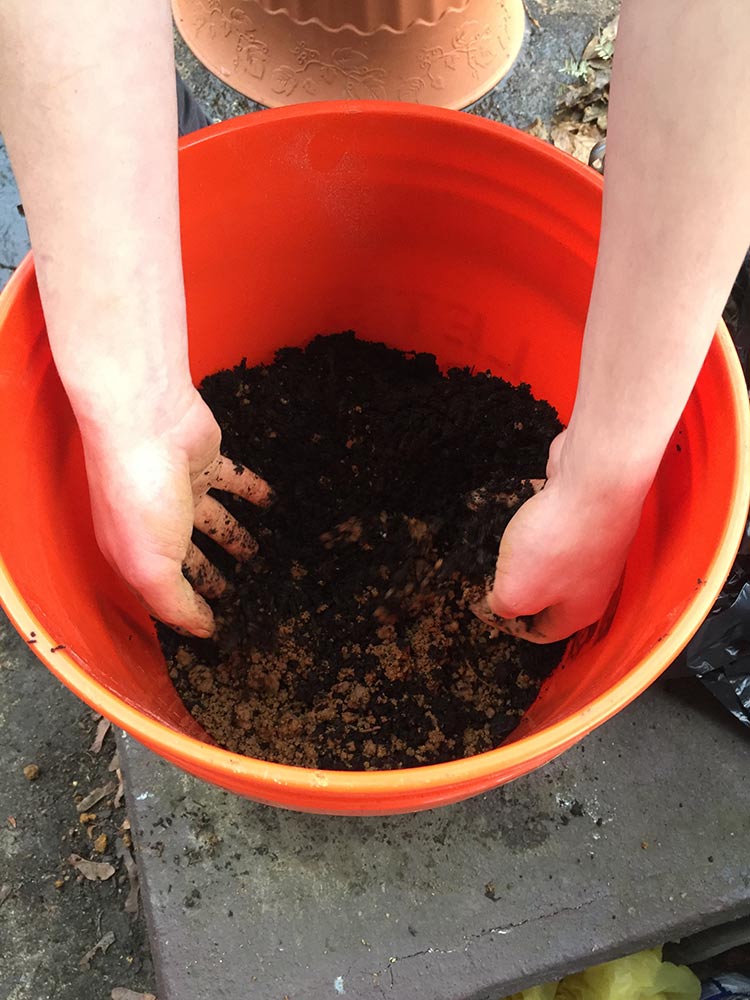
We added our finished compost (1 part) and mixed the clay carefully.

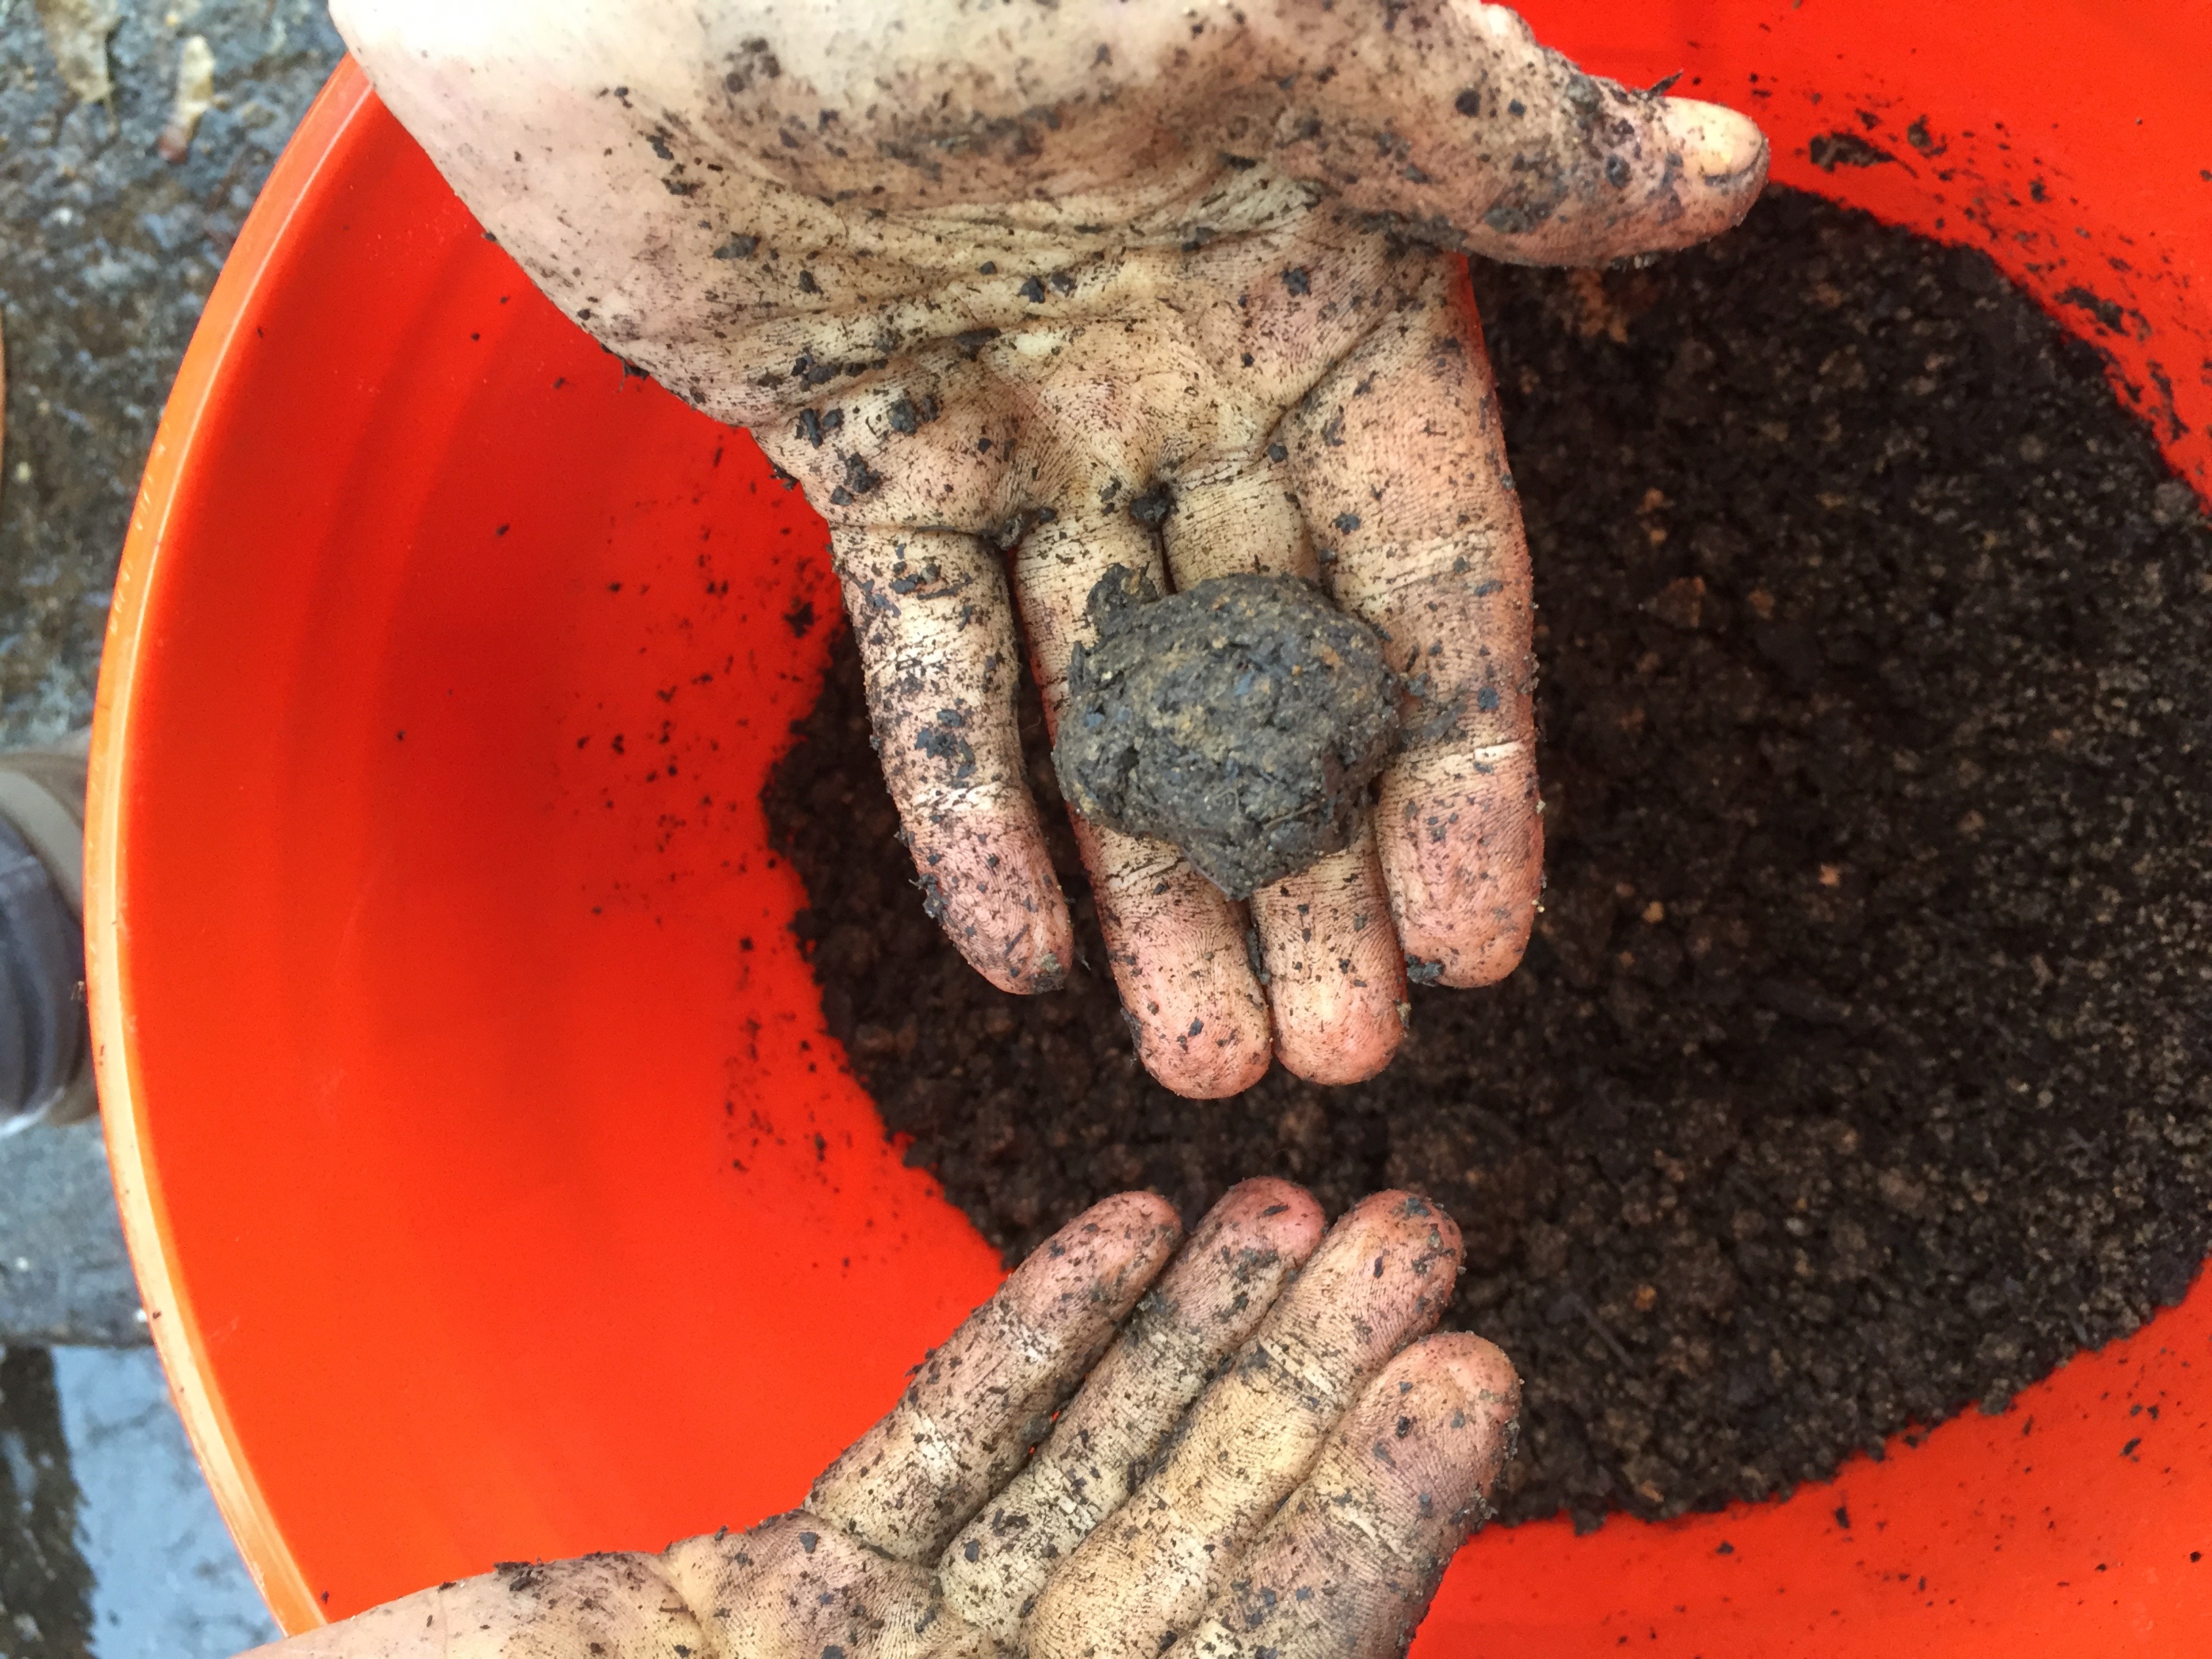
After mixing, we tested the seed balls to see if they stuck together. Sometimes, you might need to add a bit of water, depending on how moist the clay was. We added about 1 cup of water to our bucket and then checked to see if it formed a ball. If it forms a nice ball, it’s ready to go.

At this point, we found that it’s helpful to spread the material out on the tarp/plastic bag so that you can get an even amount of seeds in each ball. After spreading out our mixture, we have begun to add aster seeds. You pretty much add as much speed as you like–the balls that we’ve made this time and in the past generally had a lot of seeds!

We added a lot of seeds–in this batch, it was what I could find: blue vervain, pleurisy root/swamp milkweed, blue vervain, milkweed, and some stinging nettle.

Once the seeds were spread out, we mixed everything together and began forming our seed balls.
There are a few strategies to make the balls–one strategy is to roll out a long “worm” (ok, it totally looks like a turd) and then break off smaller bits, forming them into balls.

We made a good number of balls–probably 120+ with the mixture we had made.

Drying your balls
Since its winter here and the weather is generally quite chilly in January, I ended up laying my balls on my seed starting rack that I just put up. It is near a heat register, which allowed them to dry quite quickly. I put them down on some paper bags I had cut up.

Blessing your seed balls
Of course, no magic seed ball would be complete without a blessing. So many things you can do for this, and I think any blessing you give will help set your intentions for the seeds to grow. A few ideas:
- A nice blessing oil that you can use to touch each seed ball saying a small prayer
- An elemental blessing (four elements) or three druid elements blessing
- Put them in the center of your circle during a druid holiday. I’ll be blessing my most recent batch at Imbolc in a week or so.
- You can make these on a full moon, on a holiday (Samhuinn or Yule being a good example) for added effect.
Scattering Your Seeds

Scattering the seeds is a huge part of the fun. I like to make extra and give them as gifts to those who would appreciate them–then the seeds can go even further.
The easiest way of scattering them is just tossing them wherever you want them to grow. Remember that some seeds need a cold period (cold stratification) so tossing them even in the wintertime isn’t a bad idea!
The sky is the limit in terms of these seeds. Make yourself a little bag, take it with you where you go, and have fun! With each toss, you regenerate the land, bless the land, and scatter abundance.


Thanks for the tips on finding clay. I have vanishingly small amounts of it in my own soil and it never occurred to me how I might spot it elsewhere. I’ve done a couple of tests with kitty litter and diatomacious earth with seed balls in mind. I got promising results but, even though those things are lighter to ship than more recognizable forms of clay, I agree that the carbon costs of shipping should be avoided whenever possible.
I noticed in your last post that you’ve got ground nuts. My interest in wildcrafting started with foraging, and I’ve been scanning the woods and stream banks for those red-brown flowers for years with no luck. Do you belong to a seed exchange program? I’ve been looking around, trying to decide which one to join. Knowing which one you belong to would go a long way towards helping me make that decision. I’ve got two species of echinacea in my own little refugia (that’s a great word), I should have plenty of seeds come fall.
Hm….I hadn’t considered DE in my blend. Nice idea. You can get the fully dried clay as well, but its usually for cosmetic grade stuff! I do have some ground nuts, lol! Mostly wild at this point, but I’m going to start cultivating them more seriously in the coming years.
I belong to the Seed Saver’s Exchange, and really support the work they do. I haven’t had experience with others, although I do have a few other organic/non-GMO small family seed farmers I really like, like Fruition seeds :).
Reblogged this on ravenhawks' magazine.
Thank you for the reblog, Ravenhawk! I hope you are doing well! 🙂
I am well, hope the snow storm isn’t causing to much trouble in your area
We only have 6″ here. Its just on the outer edge. And the snow has stopped. So not much going on–but even 30 min or 1 hour south of me, they have like 18″! And in the ridges and Laurel Highlands, some places there have up to 24″ :). I feel kind of ripped off here, lol!
I did this once as a ritual that we bought the clay because we had no idea where we could get some in the city . We were using the seed bombs for lots that had been left abandoned . Do you have advice for what to do about Clay if you live in a Metropolis? Also you didn’t mention having a nitrogen fixer like clover, I think unless I missed it in the article . Is that something people don’t think about now? It used to be the big thing . I had a warm composter inside so we had good compost but the clay was really the hard part . I thought that it would be something we could buy from at least a local business even if they had shipped it , but it turned out that it was so hard to find even at art supply stores we did have to ship it and it’s really heavy so environmentally and economically it made no sense to do it again . It was a really good ritual for late winter when everyone’s talking about the wheel of the year starting to show growth and you are somewhere very cold wondering what they’re talking about LOL you can make the seed balls and they did need to have some cold first , so it made a lot more sense then when I would go to a spring equinox ritual and be given some seeds and then go outside into 2 feet of snow . We focused on flowers for bees since they are dying off . Now that I’m in the country again I like the idea of doing them for endangered native plants that would grow on the ground under the new forests . There’s so many of those strange forests where all the trees are lined up perfectly that it’s kind of creepy but there’s not really anything on the floor so thank you for the suggestion .
Hi Heatherawen! Nice to hear from you. Did you see of a ceramic supplier carries Dry Clay? Here’s one who does: https://www.mnclay.com/clay_bodies/stoneware.aspx. They carry all of their different clays in dry or wet. That would be what I would do, and then I would mix the clay with the compost, and add a good deal more water, let it sit and absorb for a bit, and test the mix.
I didn’t add a nitrogen fixer to this one for a simple reason–most of the areas that I’m interested in throwing these are already growing copious amounts of crown vetch or red clover–in other words, they are already present. However, if you were hitting a bare area, I would certainly add in blue false indigo or red clover or something similar. Thanks for mentioning that!
And I love building this into multiple wheel of the year rituals! That’s a great–fantastic–idea!
Blessings!
We did end up ordering it from somewhere online , it’s good to have a link cell so thank you very much! Thank you to four explaining about the nitrogen fixing . When I was reading what you wrote I kept thinking ” wait we didn’t need all that Redclover!” LOL . That’s another important thing to take into consideration , if there arty are nitrogen fixtures there not having to add any .
What about for evergreen forests? I live very far north end most of the new forests that it been planted are evergreens which I know don’t have the same worms in the soil because of the codings of pine or spruce leaves . But normally we would have things like ladies slippers . Is that a case where you just need to buy the plants that would be in a pine forest and plant them ? You can’t really do seed balls with a pine forest can you? People go and look for mushrooms while I look for usnea. I was just wondering , if you’ve done a post about Evergreen areas which are second or third growth forests you could just leave the link that would be great. It’s a totally different ecosystem . But it is really commonplace unlike if I was living in a area that was all walnut orchards . I actually found in a permaculture meditation book a bunch of things a woman did too found herself with a walnut orchard because that’s the thing I always hear people act as if it’s hopeless about . So if there are things that you can do with a walnut forest then I’m guessing there are things that we can do here with all of the new evergreen forests ! If there is a link to some other resource about it that would be really helpful to .
As always thank you for such a really pragmatic comprehensive look at rewilding . It’s not just of the acts that we do, it’s all the things that lead up to it in the big picture that also matter and it’s really easy to forget that end end up doing more environmental damage in the long run doing what we think is so helpful . I just started laughing because I’ve learned those things the hard way when I’ve sat in there and done the math in my head . Connecting it all to the full cycle is really important but very few books really talk about that .
Heather, I haven’t talked about evergreen forests, but I can share some of what I’ve observed in the old growth Hemlock forest that I’ve spent some time in (https://druidgarden.wordpress.com/2014/07/20/returning-to-the-hemlock-grove-old-growth-forests-as-sacred-sites/). Most of the forest plants I mentioned don’t like the acidity of confiers. One rare plant that is at risk, however, does–its called partridge berry. Wintegreen, also, might do well under those.What I found in the hemlock grove was abundant partridge berry, bracken fern, and wintergreen–and abundant Reishi mushroom (https://druidgarden.wordpress.com/2013/08/02/wild-medicinal-plant-profile-reishi-mushrooms-ganoderma-tsugae-or-the-mystery-of-the-stumps-revisited/) ! This was in addition to various mosses and lichens.
I’d suggest visiting any old growth conifer forests you can in your area and taking a look at what’s on the forest floor there–especially those that are spruce or pine (hemlock might be a little different–I’m not sure. Its the dominant confier around here).
I think there’s lots of stuff that you can do with a walnut grove–and certainly lots of plants that can peacefully co-exist with walnut :). Spicebush and black raspberry come to mind. I learned this, also, through observation under walnut trees.
Thank you for your kind words :). I do think is so easy to get our heads buried deeply into the problems we can’t fix rather than trying to do something. It has taken me many years of study, reflection, action, and meditation to get to this point–as well as a lot of strong support and mentoring :). But I am so happy to share and am excited that people read what I write!
Thank you!
I love this. Thank you!!
Blessings and Love
Mary
Blessings to you too, Mary! 🙂
Reblogged this on Laura Bruno's Blog and commented:
Brimful of good ideas, as usual! I’m going to try some seed balls this time, since the wide variety of endangered medicinal herb seeds I winter sowed in milk jugs didn’t all grow or transplant well. The seed balls seem like a good way to get more milkweed and medicinal herbs around town. I appreciate Dana’s extra touch of magic and blessing to this process and suspect it’s the real key to success!
Magic is *always* the key to success :). Thanks for the Reblog, Laura! 🙂
These are great! I’m going to see if we can make this a kid activity for our community’s next work weekend. (I absolutely love living in cohousing, but there’s a lot of damage to be repaired still from the building of the development, now over five years ago.)
[…] with great instructions on to make them. The balls are made of clay, compost and seeds, one of which should be a nitrogen fixer like Clover. Bees love Clover. Making seed balls is not hard and it is a fun group project. The Druid’s Garden https://druidgarden.wordpress.com/2016/01/22/making-seed-balls-and-scattering-seeds-for-wildtending/ […]
Thanks for the link! 🙂 Bees do love clover–of all kinds! Sweet, red, dutch, etc 🙂
[…] like Clover. Bees love Clover. Making seed balls is not hard and it is a fun group project. The Druid’s Garden has the most truly environmental way to make seed balls, although many of us probably won’t be […]
Reblogged this on Rattiesforeverworldpresscom.