Throughout ancient sites in the UK, where Druidry originated, we find barrows, underground tunnels, and chambers hidden deep within the earth. These “protective places” are sites sheltered from the elements, the bitter cold and frigid winds, where people could find nourishment and strength. We see similar sites being used throughout the world, some permanent, and some temporary (like Native American sweat lodges that could be moved from place to place). Even today, entering one of these places, and the shelter they provide, allows us to grow and develop greater spiritual insights.

What do these places have to do with gardening? As gardeners, we can use this idea of shelter–both for what it gives us and for protecting the plants that we grow. Sometimes, a little shelter allows us to grow faster, and better, than being exposed to the elements.
For the last eight months, I have been experimenting with hoop house gardening, which has allowed me to use small, movable hoop houses to shelter my plants and extend my growing season. The following are some observations about hoop house gardening as well as directions for creating and using your own hoop house.

Hoop House Gardening
On March 1st, 2012 I started my hoop houses (after giving them a break in January and February). As a test, I planted the same set of seeds outside the hoop house as compared to inside the hoop house.
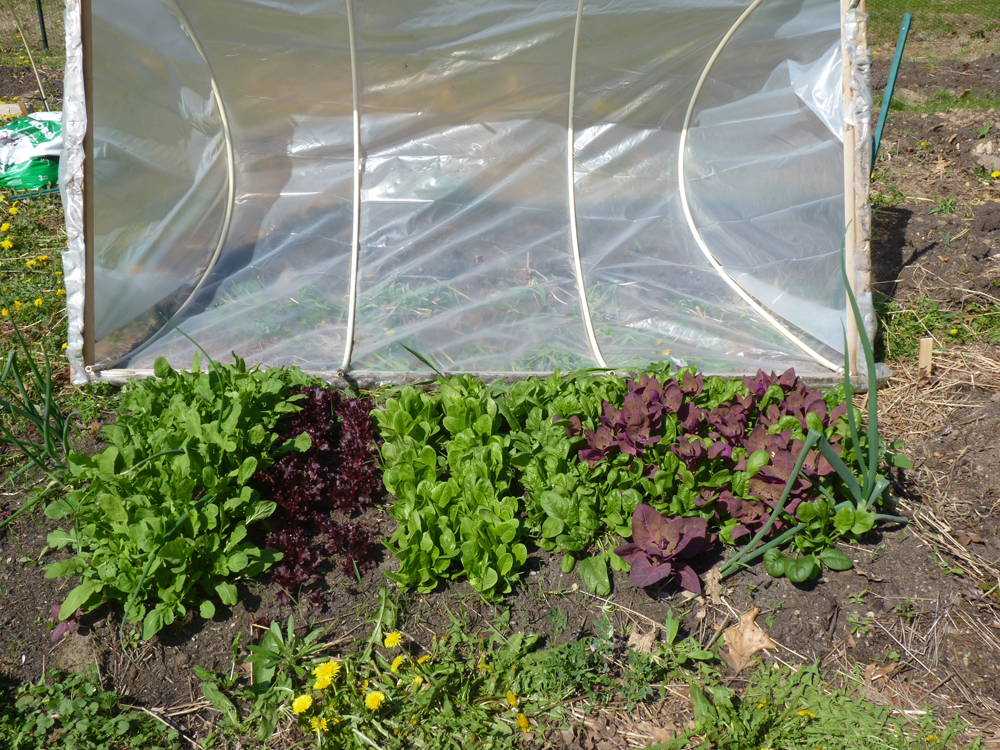
Here are the photos of the test garden vs. the hoop house. Planted in both plots were Spinach (American and Purple Passion); lettuce (two kinds), arugula, and leeks). All of these are cold-resistant varieties that are meant to do well and handle frost. I should add that I did cover the non-hoop house area with straw to help keep out the elements. It didn’t help, lol.
I should also mention that half of what you see in the left hand photo below are probably weeds.
The key for my hoop houses is that they are movable, so that as the weather changes, I can cover and uncover various parts of my garden (which are all 4′ wide, the same width as the hoop house). Although typically you can’t plant tomatoes here until the last frost date (May 27th), some of my tomatoes will go in 5 weeks early and be placed under one of my two hoop houses (at this point, the greens that are under them will be able to withstand the cold temperatures because they will no longer be going below 25 or so). This means that I’ll have tomatoes earlier than anyone else!
In The Winter Harvest Handbook, Elliott Coleman (who is a fabulous gardener and writer) describes the technique of using movable hoop houses on a larger scale. As he writes, hoop houses used in the fall allow us to extend the harvest season–but not necessarily the growing season. When it gets bitter cold, the plants go into dormancy (I experienced this last December with my kale and arugula). This means that you want your plants timed so that by late October (at least in my zone) they are done growing. The shelter of the hoop house allows the plants to be protected, however, and you can continue to harvest through at least the winter solstice. (Even in our Zone six climate in South-East Michigan, I was able to harvest greens for Thanksgiving and Yule dinners!)
I learned this lesson the hard way. I planted some onions in late July and eventually covered that area with the hoop house. The onions were 100 days till harvest, and needless to say, were only a few inches high when January hit. I ignored them in their hoop house through the frigid months, and when I opened up the hoop houses two months later, there they were–and now they are almost ready to harvest in mid-April! You can see them in the photos above :).
Hoop House Construction
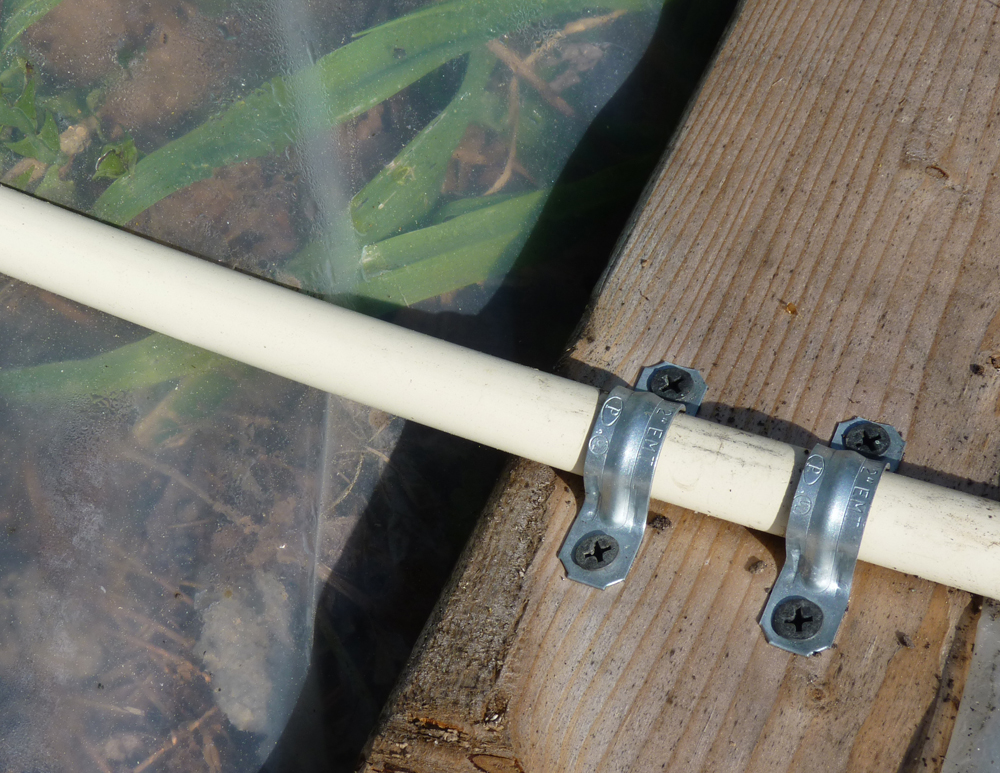
Hoop houses are really quite simple to build–and you can probably do it with mostly re-purposed/recycled materials (I reused plastic drop cloths and some lumber scraps in my design). The hoop houses that I am using are 7′ long and 4′ wide, with hoops made from PVC plastic that are about 2.5 – 3 feet high. I wanted to make them a little longer (8′, but 7′ boards were all I could fit in my car, lol!)
I used pine boards for the base (but you could use Cedar for better rot protection).
Building a hoop house is really simple–its a wooden frame (screwed together) with “hoops” (I used PVC plastic pipes) and covered with plastic stapled to the frame. The hoop houses I made cost about $20-$25/each.


Any problems with skunks or other little beasties tearing through the plastic?
No, no issues with little beasties. The biggest problem I had in the fall were slugs, which were content to live in my arugula most of the winter. There are organic ways of dealing with them though :).
I’m always fascinated by people who can create and maintain such a sustainable life. To be honest, I have little personal love for living off the grid, but it doesn’t lessen how impressive this is. I like to plant a box garden every spring, as well as a pot of lavender by the front door that gives off a wonderful smell and I periodically harvest for my salves. Whatever we have in our side garden must be some good shit because last year I got so busy with school I completely forgot about it and we still had tomatoes like fists and cucumbers that would make porn stars feel impotent.
Out of curiosity, I would like to see you do a post on how you got started along this path. What made you decide to do sustainable living? Did you start small or go full throttle? What did you start out with?
So I know I’m commenting on an old post, but hopefully we’ll finally be making a set for the community garden this weekend. The information you gave here was a TON of help, thank you!
I hope they work out! They are just WONDERFUL….I have them planted now (mid-March) 🙂
[…] spring I was inspired by Dana’s post on cold frames/hoop houses over at the Druid’s Garden. Though we didn’t have enough money in the budget for these […]