Last year, I reported that I started my garden beds using a Sheet Mulching (aka Lasagnia Gardening) approach that I found in Gaia’s Garden and select places online, such as here, here and here. A year later, and I’d like to add to the Sheet Mulching discussion with some necessary tips and feedback from the garden.
Why sheet mulch?
Sheet mulching allows you to create wonderful garden beds while using natural processes–no chemicals, no sprays, and no tilling. Basically, with a sheet mulch method, you are replicating the process that you find on any forest floor where new material is continually added to the old, and a rich bed of black soil is formed. This process is a wonderful way of adding garden beds and enriching a poor soil.
Traditional Sheet Mulching for Garden Beds
Traditional sheet mulching, permaculture style, has the following steps, also outlined in the links above:
1. Mow down or flatten the grass in the area that you want to mulch.
2. Lay down a weed suppression layer (cardboard or newspaper, no colored dyes, as these dyes can contain heavy metals). Wet this stuff down. Some instructions call for a layer of compost or manure placed under the weed suppression layer (but I didn’t do this).
3. Next, layer different materials in thin layers on top of the cardboard. These materials might include: manure, compost, grass clippings, yard waste, wood chips, fall leaves, etc. Wet down each layer good as you are layering.
4. Pile these up a good 2′ – 3′ or so, and then cover with straw and allow the sheet mulch to sit over winter.
5. In the spring, plant in your beds and enjoy your garden!
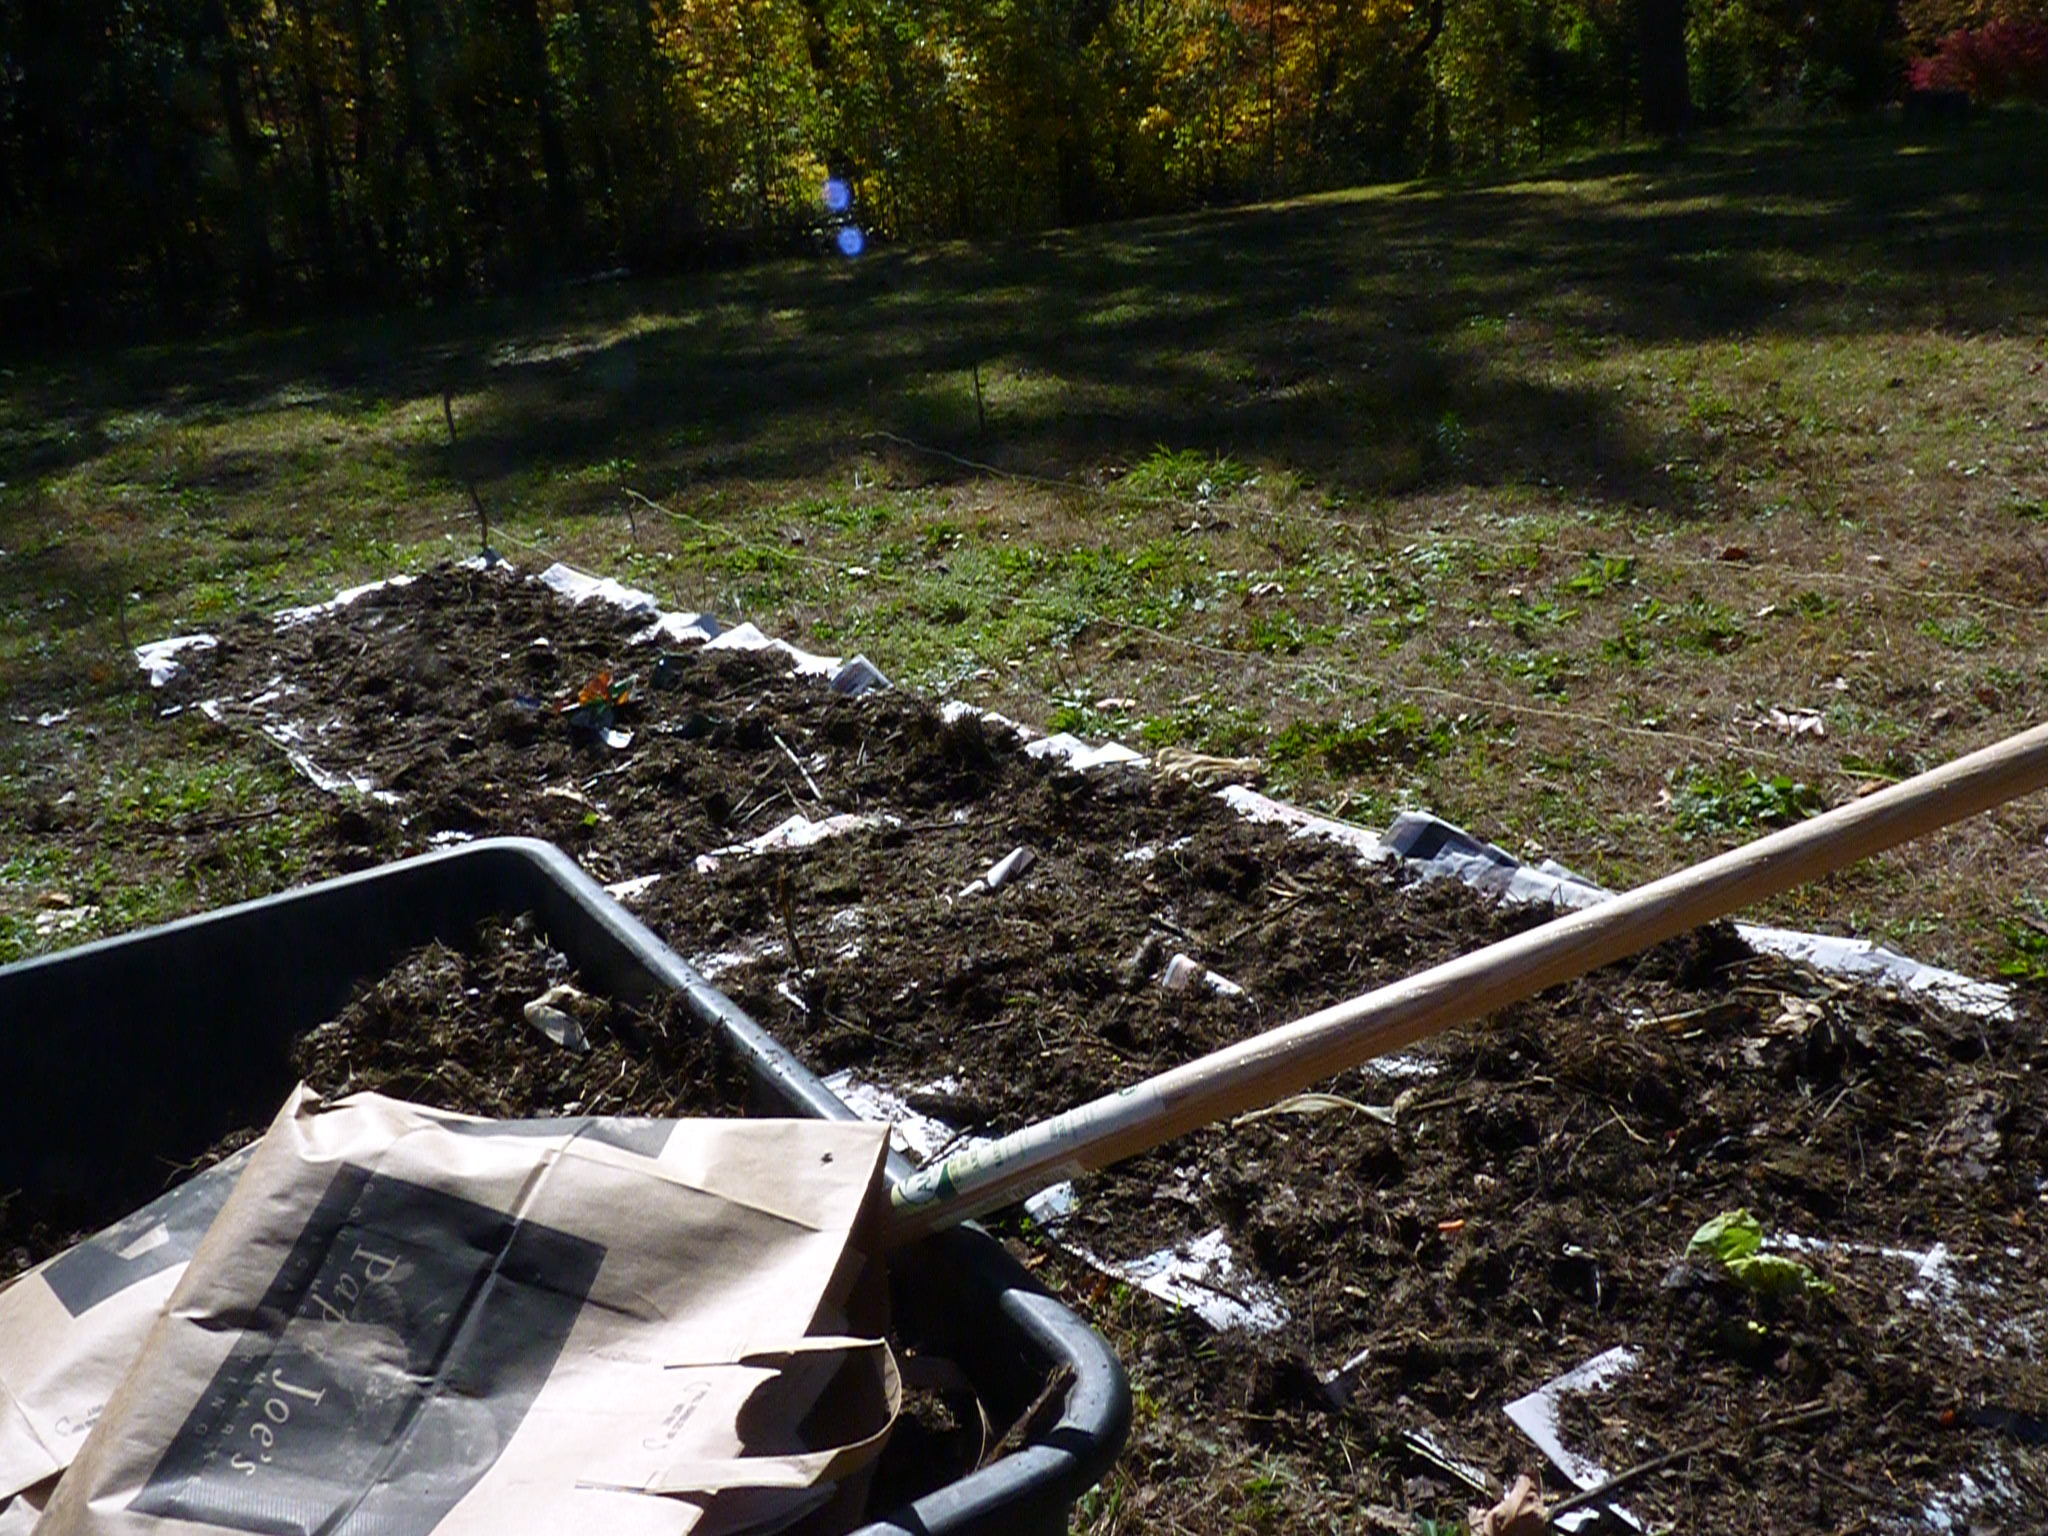
If you might recall, this is exactly what I did last year. I used about 10% compost that we had generated throughout the summer (pictured) and then 45% fall leaves (mulched up with the mower a bit) and 45% composed horse manure from a local farm. And overall, it was fairly successful, but I think I have some revisions to this process and additional suggestions which can make a good process even better. The photo to the right shows my sheet mulch in its early stages, after laying down my compost and newspaper in Fall 2010.
Successes and Limitations to the Traditional Model
Since my sheet mulching to establish my first three garden beds (4′ x 20′ each) last year, I’ve had a year to work with these beds, grow veggies, and get a sense of their limitations. Here are the four successes of this approach:
- Success: A rich luxurious soil. When I planted my veggies in the spring, the mulch was still breaking down. I had to add some pockets with finished soil to compensate. But as the summer progressed, the soil that had been leaves and manure became a wonderful, spongy, soil. So I’d say the soil sheet mulches produce, given time, is wonderful.
- Success: Weed suppression. If you are looking for weed suppression, the cardboard and newspapers certainly did the trick! I also tried sheet mulching another area with a thick layer of wet leaves–this worked less well, but I also didn’t add as many mulch layers on top.
- Success: Sourcing Local Ingredients: Sheet mulching allows you to recycle ingredients such as cardboard and newspapers and use locally produced materials rather than purchasing expensive soils that have been shipped from who knows where using fossil fuels. I used four main sources for my sheet mulches: 1) my own organic compost; 2) horse manure from 1.5 miles down the road; 3) fall leaves that fell on our property and some of the neighbors properties; and 4) other “yard waste” from the neighbors that I would drive around and pick up. (Note on this last issue–you have to be very careful about what you pick up–lots of neighbors like to use nasty chemicals, so I only picked up tree clippings and fall leaves, which I knew were less likely to contain chemicals).
- Success: Fantastic Veggies (for the most part!) The veggies, tomatoes, lettuce, and kale, especially, really seemed to enjoy the soil that was created as part of this process.
- Challenge: Inadequate Soil Composting in one winter: I established most of my beds in the fall – late October and early November (this was based on when I could get my hands on that great horse manure!) I started planting veggies in mid to late April. We had a fairly typical winter for Zone 5 in South East Michigan in the 2010-2011 year. So in about six months, I had hoped for some really great soil. I didn’t quite get that. When I started planting, much of the leaves, manure, and grass clippings weren’t composed down quite enough. To compensate, I added potting soil (also locally sourced) into the beds in an area around the plants. This seemed to work well. If you want really great soil, you’ll need to establish the beds and wait a longer time (or do what I did).
- Failure: Soil depth. Now I understand the point of a raised bed is to have your bed raised out of the soil. But after 3′ of mulch (which composts itself down to about a foot or less), I was really surprised by how little soil I really had. This caused issues with my garden, especially in plants that needed root depth. Specifically,
- I found that the cardboard, and resulting hard-packed dirt underneath, caused the roots to spread wide rather than deep. When we had 2 weeks with no rain, my plants in the sheet mulch areas dried up. My plants (same varieties) in the non-sheet mulched areas that I dug up later fared much better.
- Veggies that need thick soil also had difficulty. My carrots, when they hit the bottom of the mulch, went off in odd directions. My corn, after getting about 4′ tall, all fell over. Both of these issues could have been avoided with a modification to the basic sheet much instructions(and I’ll describe how below). I didn’t even attempt potatoes in this bed–I dug out a separate potato bed by hand the old fashioned way, lol.
- Because of the problems with the soil depth, I ended up removing all the rich sheet mulch soil, removing the remaining cardboard/weed suppression layer, and digging out all those beds this October. More on that below.
The Revised / Improved Model of Sheet Mulching!
I am proposing that you make two changes to the traditional sheet mulch method if you are using this for a vegetable garden.
1. I know it is much more work, but I strongly suggest digging out or turning over your soil before you start your mulch. Those veggies that you have that need deep root depth will sincerely thank you for it, especially down the line. I found that the hard packed dirt, combined with the weed suppression layer, pretty much made an impenetrable barrier, even to things like carrots, which have strong roots.
2. This may not work in heavy weed areas, but in part of my garden, rather than use cardboard or newspaper, I used a very thick, wet down, mat of leaves. The leaves worked great–and these are easier for veggie roots and worms to penetrate through. I had a few pesky pieces of grass and dandilons growing up through that one section, but it was quite minor and nothing a 5 minute weeding job couldn’t take care of.
So enjoy your fall garden time, and remember that sheet mulching is a fantastic way to use up those fall leaves!


As a fellow SE Michigan I would love to hear your thoughts on this backyard goal in Sheet Mulching. I have a small backyard that is not level, has drainage issues and is covered in grass & weeds that myself and my rescue dog is severely allergic too. The goal is to improve drainage, level it, divert downpour away from home and remove grass. It’s almost the end of August, and I was wondering if adding soil is a smarter strategy before doing the Fall sheet mulching or would it be better to add next Spring after the weeds and grass are suppressed? My idea is using a few rain barrels for water diversion asap, then eventually, say in the Spring make a grass free yard with a series of stepping stones, gravel, with a few garden areas and sitting area. That way, I do not have to suffer from allergies and I won’t have to wash my dog’s paws everytime he walks in the yard, and my home has proper downpour grading! Any thoughts on timing and materials? Dog is allergic to cedar mulch, pretty much any wood according to his testing. Thanks in advance!
Hi Lisa,
Two ideas for you:
Concerning water: You might consider a swale to catch and sink the water in one of your gardens. You can use one that goes off contour, meaning that it goes downward from your house, and then plant a rain garden and plants along it. The issue with using rain barrels is that they may easily overflow. Planting a rain garden and using a swale or something else to divert it will be a productive use of that water. That way, you are using to to grow food and plants. Its hard to get more specific without seeing your site, but that might help you. More on Swales: http://permaculturenews.org/2012/05/16/swales-the-permaculture-element-that-really-holds-water/
Concerning soil: You can sheet mulch the area to improve your soil and suppress grass. Here’s a good introduction: http://www.chelseagreen.com/blogs/9-simple-steps-to-sheet-mulching/
My immediate concern is grass removal and water diversion/conservation for immediate garden…planting and going right into a design unfortunately is not an option, but a later thought once additional dirt is added to build up low grade. Keeping that in mind, exploring a gate to fend dog off sheet mulch for a long while sounds necessary if adding leaves, straw or manure/compost. I must build up fenced areas to create a bowl, then work on swale design (I can’t see an add photo option to share pic). Goal is to avoid flooding, and grass, garden to come thereafter….this is my ultimate goal. PS thank you for links….I hear what you are saying w/Rain Barrel’s but if monitored, and saving money on water bill for now given my beginning steps, sounds like I can’t lose.
Another great blog! Thank you. I experimented with solarisation, which is laying down a tarp for several weeks In order to being back a garden the had gone wild with perennial weeds. I would like too use some of the methods you describe here as a secondary step, perhaps this fall. What about adding a solarisation step To your method, followed by a light working of the soil to help the layers of mulch that are to follow to better integrate?
It may be the easiest of methods overall to start with (given I have no truck to load materials….where does one find the large dark tarps at a reasonable cost? Besides HomeDepot of course
Nevermind! Painter’s Plastic – Clear way to go…very affordable! THank you for this info – it sounds like the way to start!
I had no truck to load materials either–you can get free materials by paying attention to when tree work is being done near you. They will nearly always drop off the tree shreddings to you–and that’s great carbon. For more material, wait till the leaves fall (not too long yet) and then get them. You can also pick up cardboard and newspaper when people put it out for recycling :).